The Missing Piece of My Heart

I haven’t written a blog post since “Bonnie is in Puppy Heaven“. I have been dealing with losing her along with all of the other things that are necessary to maintain a family and home.

I have a few things that I am working on and I will write posts about those, but some things have been bothering me since we lost Bonnie and essentially, these things are giving me writers block.

I want to bring something to light, that I have the feeling most people feel but they won’t discuss. Some people might take this post the wrong way and be offended by it. But I know that some folks will appreciate me speaking my true feelings.

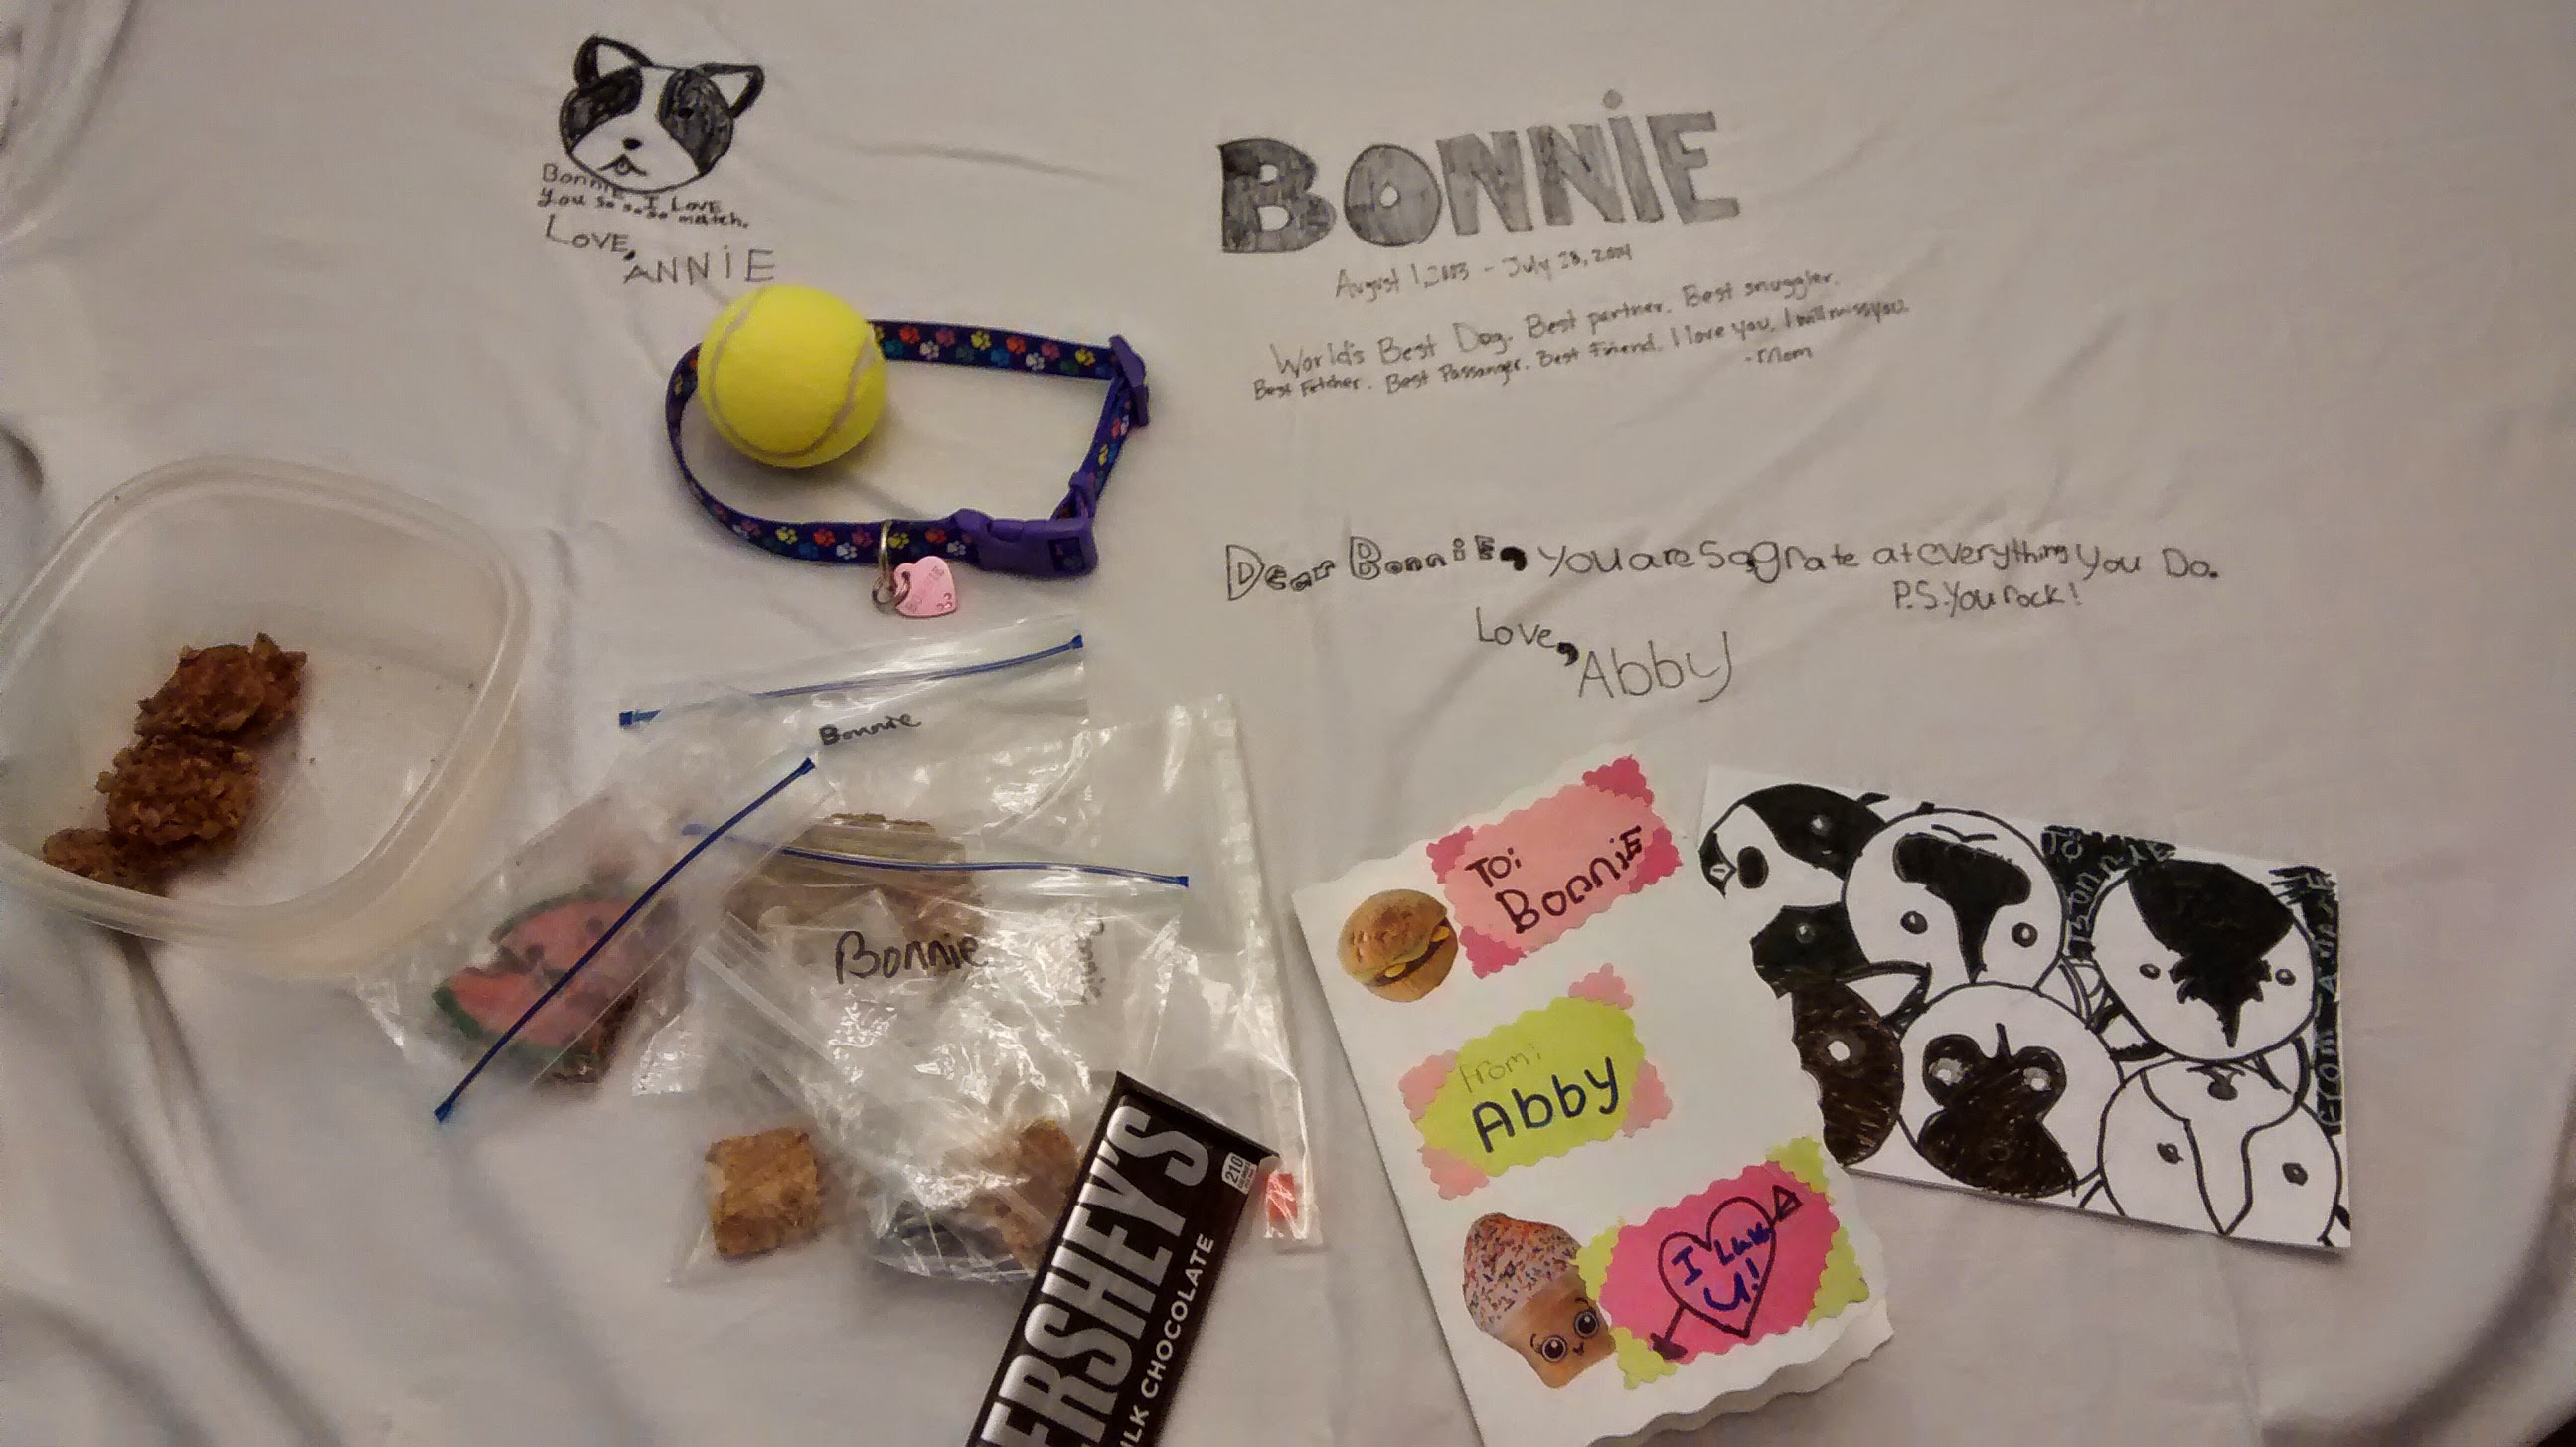
My dog died. Seems simple enough. Its “just a dog”, right?

The day after Bonnie died, I spent the day crying uncontrollably. Its only to be expected. I didn’t get much done that day. I wrote “Bonnie is in puppy Heaven”  and I took my daughters to the skating rink to try to get their minds off of it. All I could do was cry. I was in public crying. Driving and crying. Doing the dishes and crying. Showering and Crying. Lying in bed Crying. I could see it on my kids faces. The deep sadness sitting just below the surface. We all tried to keep it together but inevitably, we cried.

Things “got better” as the days went on. Basically, I got used to my dog not being there. But things never really “got better”. The heavy sadness still sits on my heart. I still see and feel my fingers gliding over her fur and tracing her wrinkles as I said good bye to her for the last time. In an instant things are not “better”.

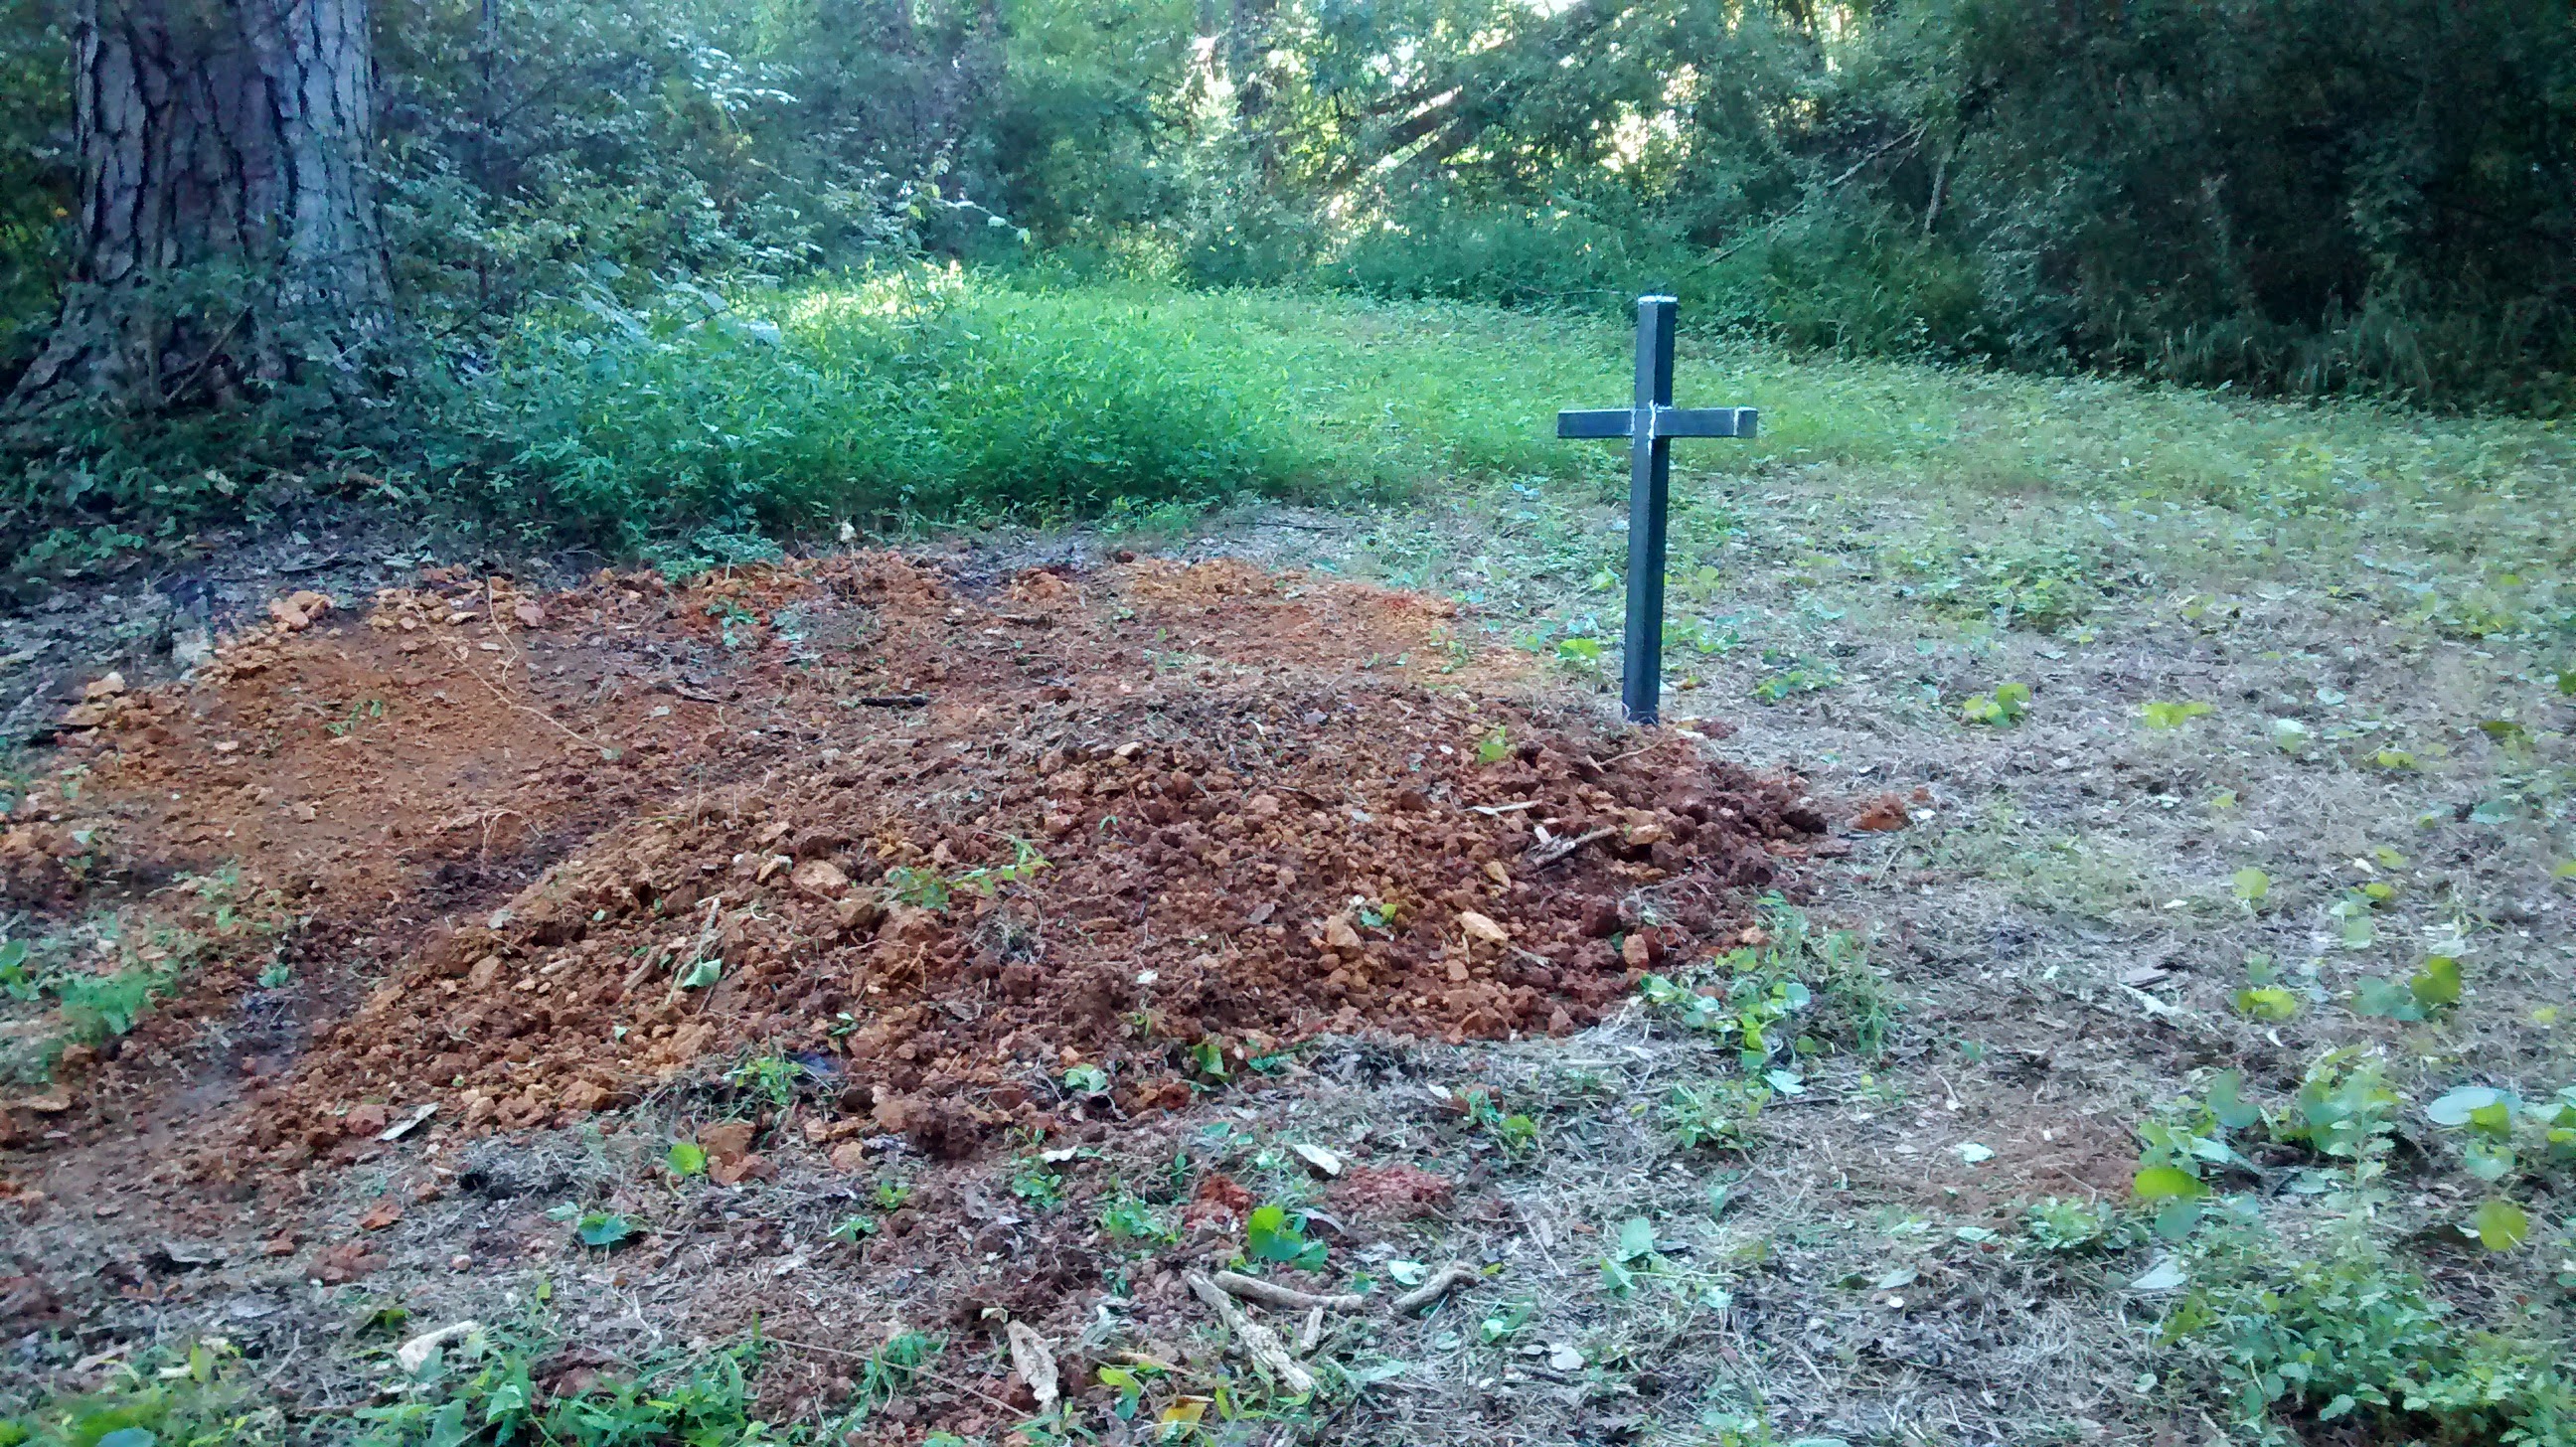
At first it felt like she just wasn’t home at the moment. I kept expecting her to come back home. Like she was on some vacation or at the vet or visiting grandma….I don’t know, just “not home”. Then my brain would tell me “no, shes over there, rotting in the ground”. Yes, I know that’s terrible, but that’s what my brain told me. And it made me mad. Did I bury her properly? Did she deserve something better? Should I have cremated her? How could I just let her rot like that? These were the thoughts that went through my head.

I was almost ashamed that we buried her. But then I realized something. She was not her body.  And her body was becoming a part of our property. It made me love my property more because I knew that her body was a part of it.

I have always heard that when you lose someone you love they never really leave you. You’ve heard it too, I’m sure. All those emotional sappy romantic ideas of someones love staying in your heart and you’ll always feel them in your heart because once you love someone they become a part of you..blah blah blah. Yada yada yada..WHATEVER! When you lose someone you love, they are gone physically and all of that “always in your heart” idea is bullshit. They are gone, and no romantic idea can take away the hurt you feel when you can’t find that missing part of your life.

As the days went on, I began to feel foolish. She was “just a dog”. I began to feel like people were thinking the same thing “why haven’t you gotten over this yet, it was just a dog”.

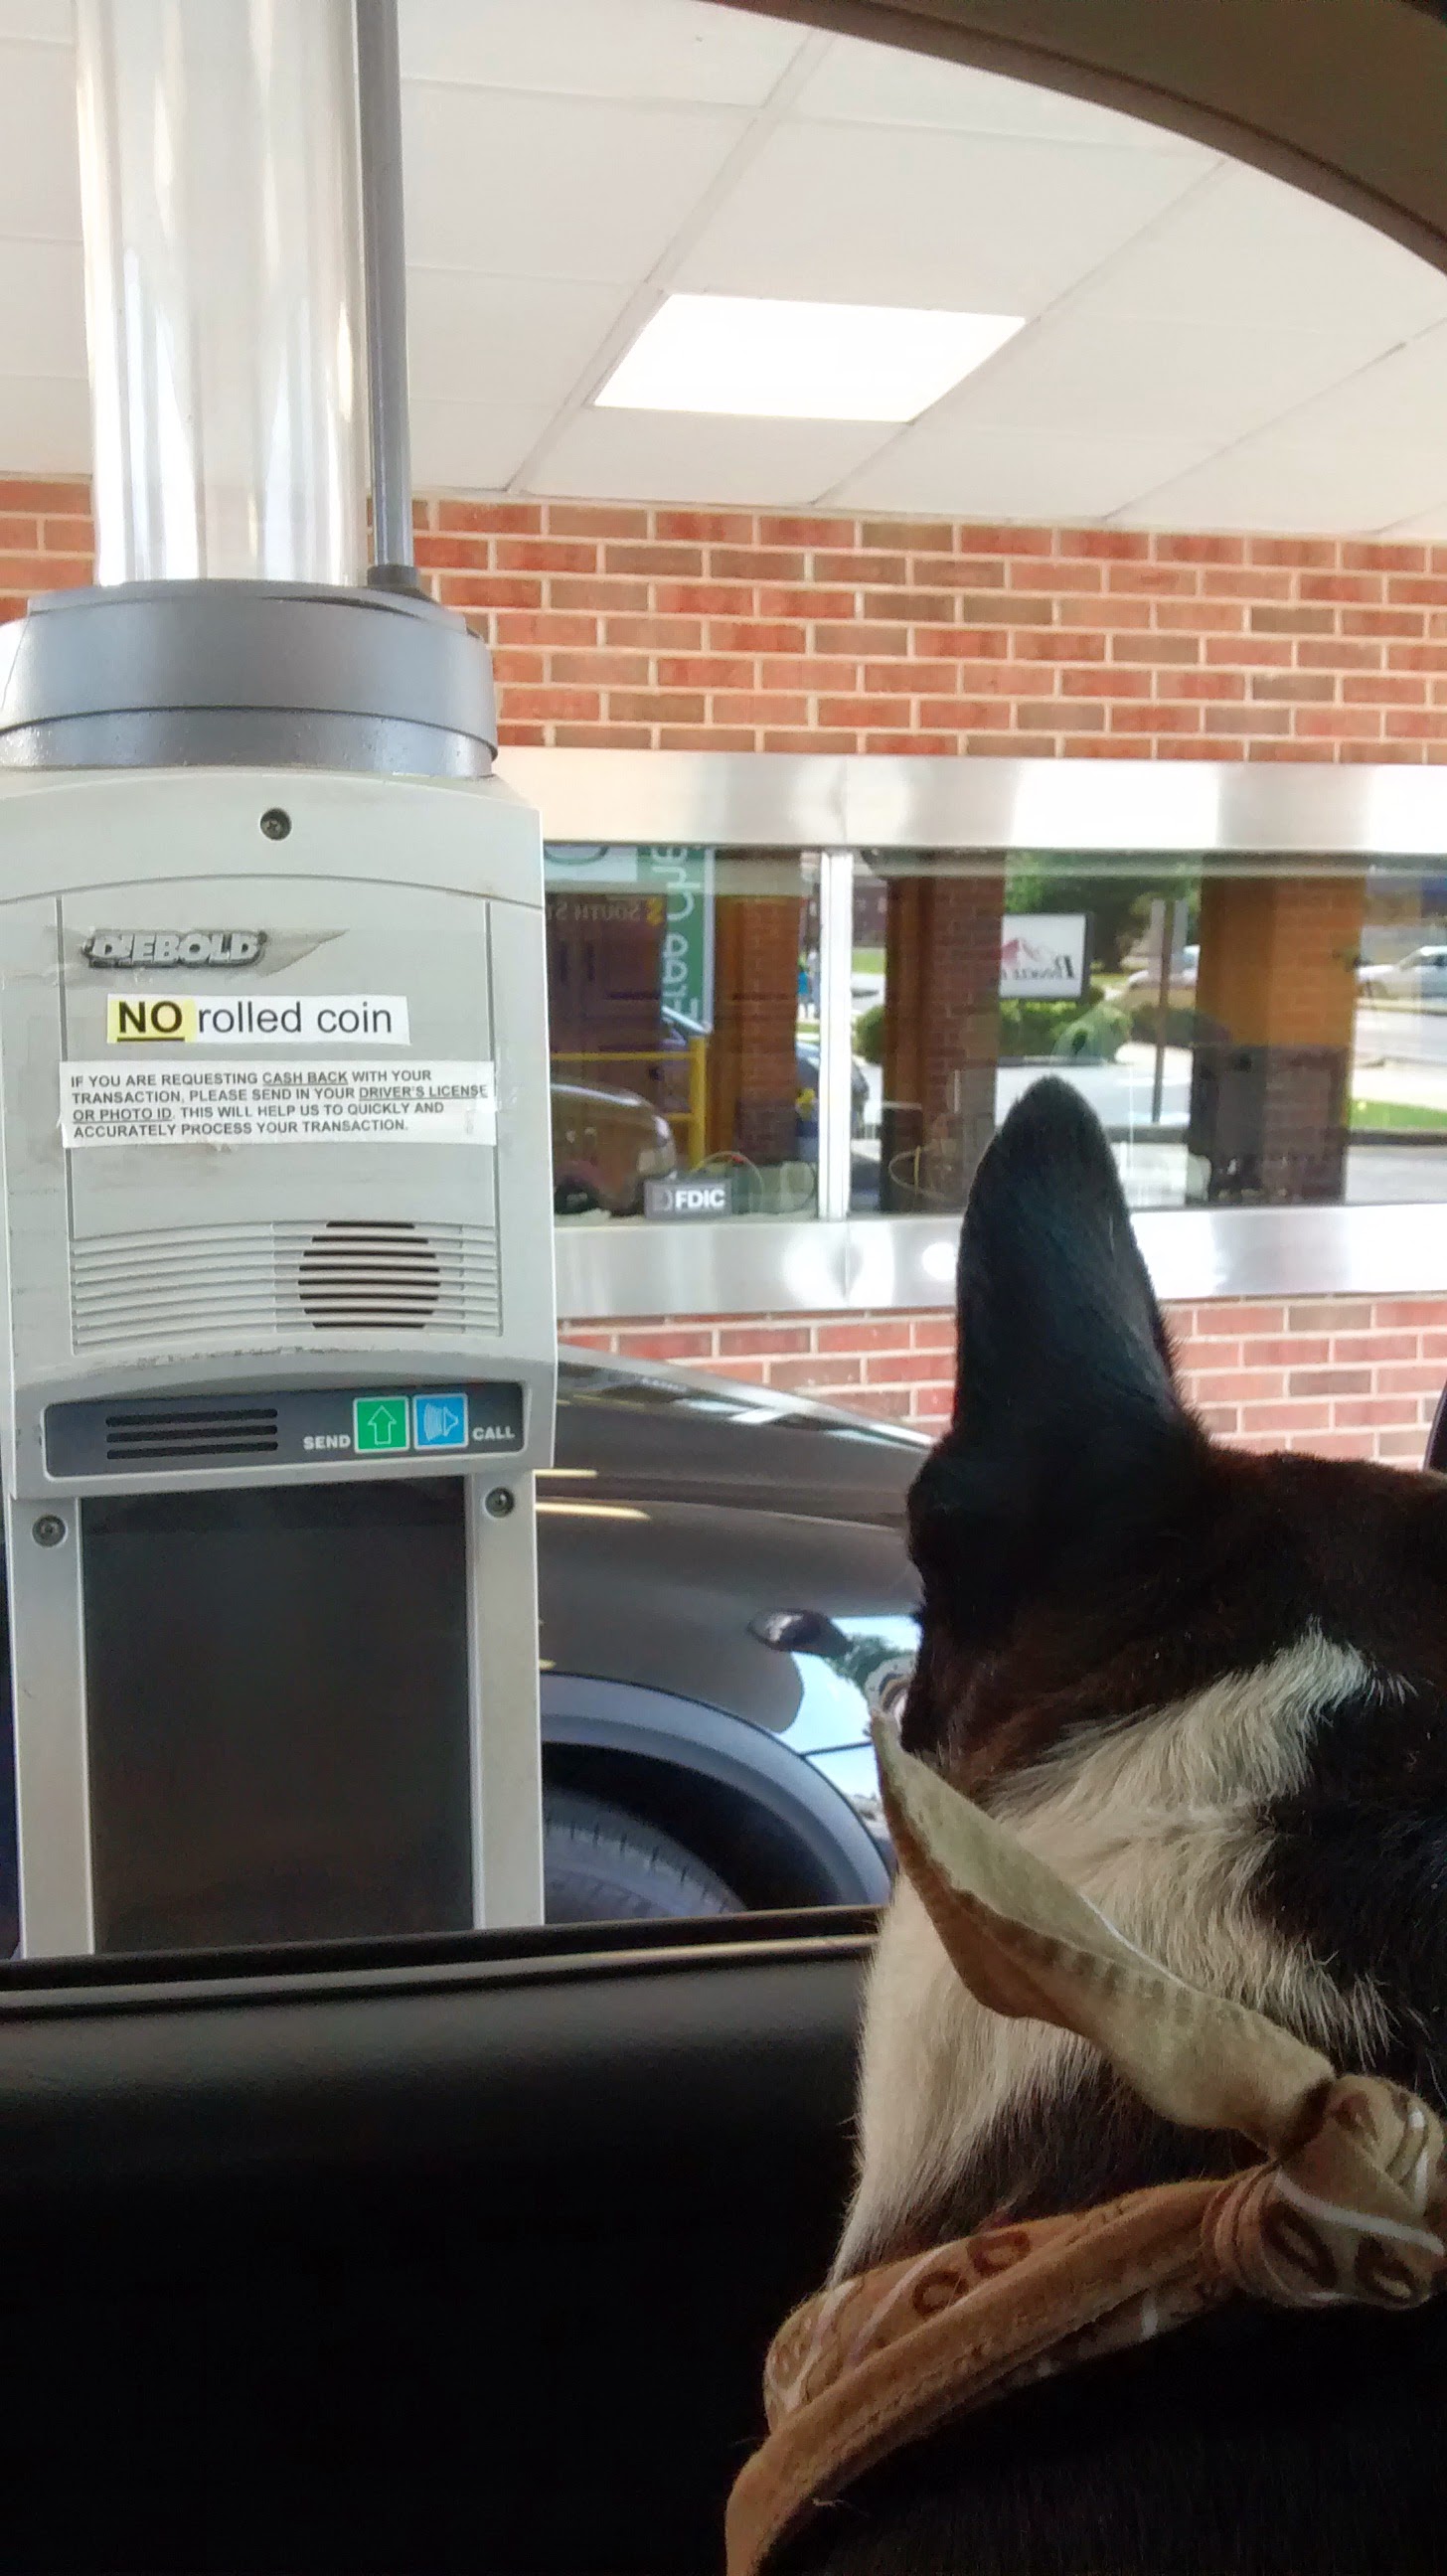
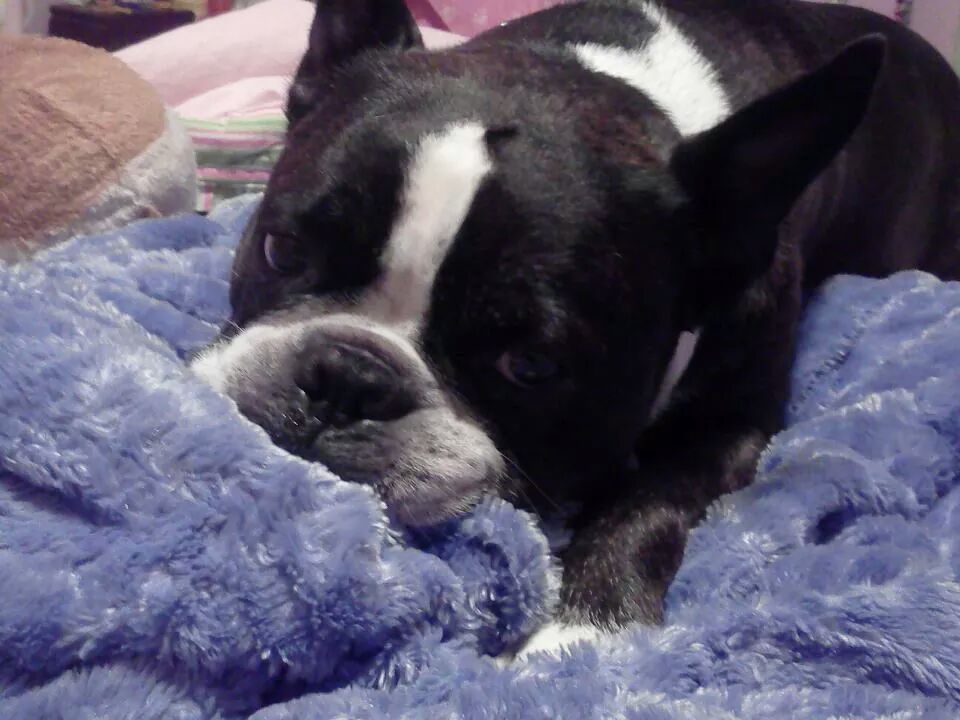
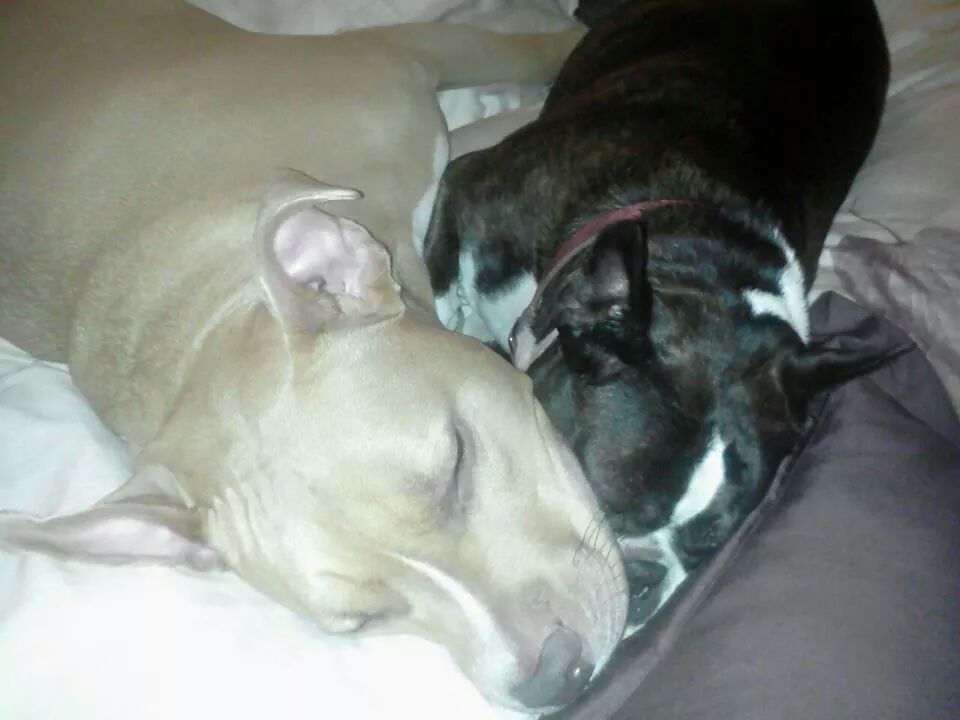
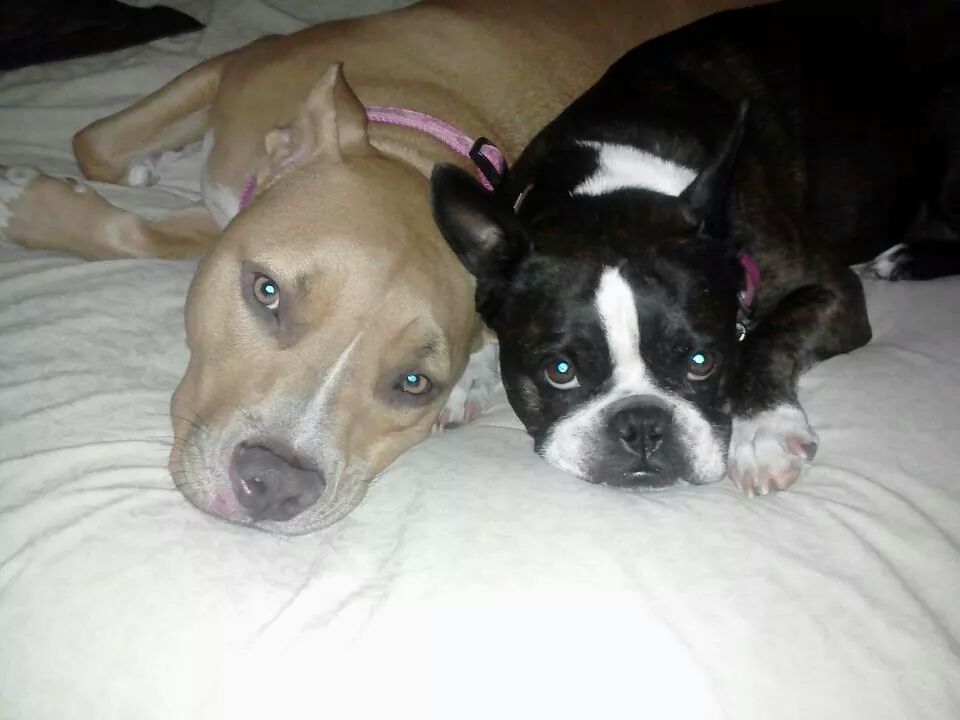
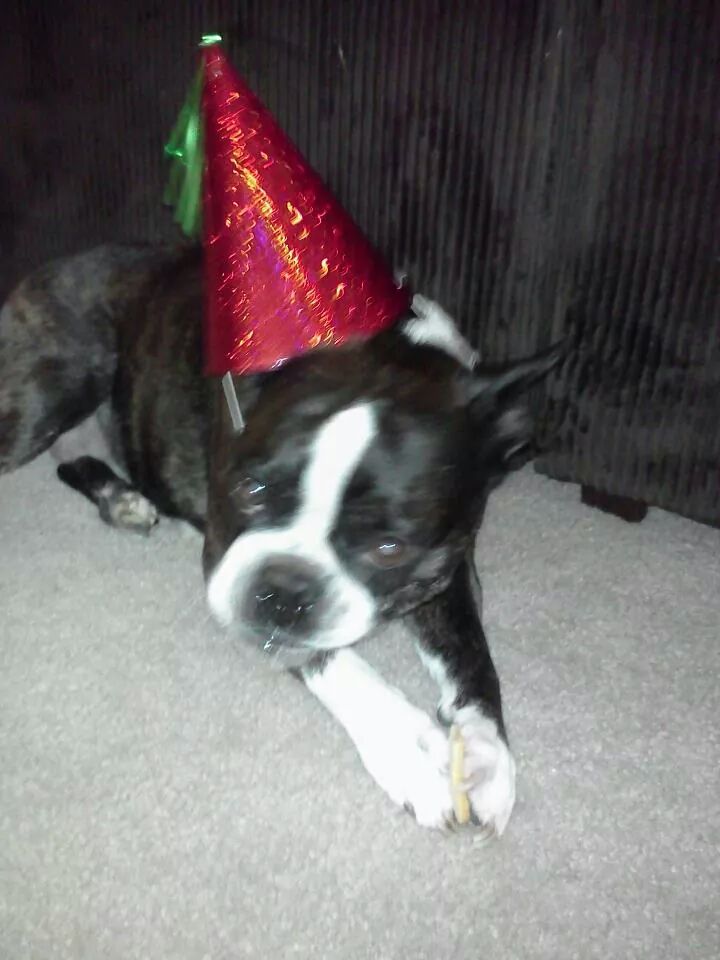
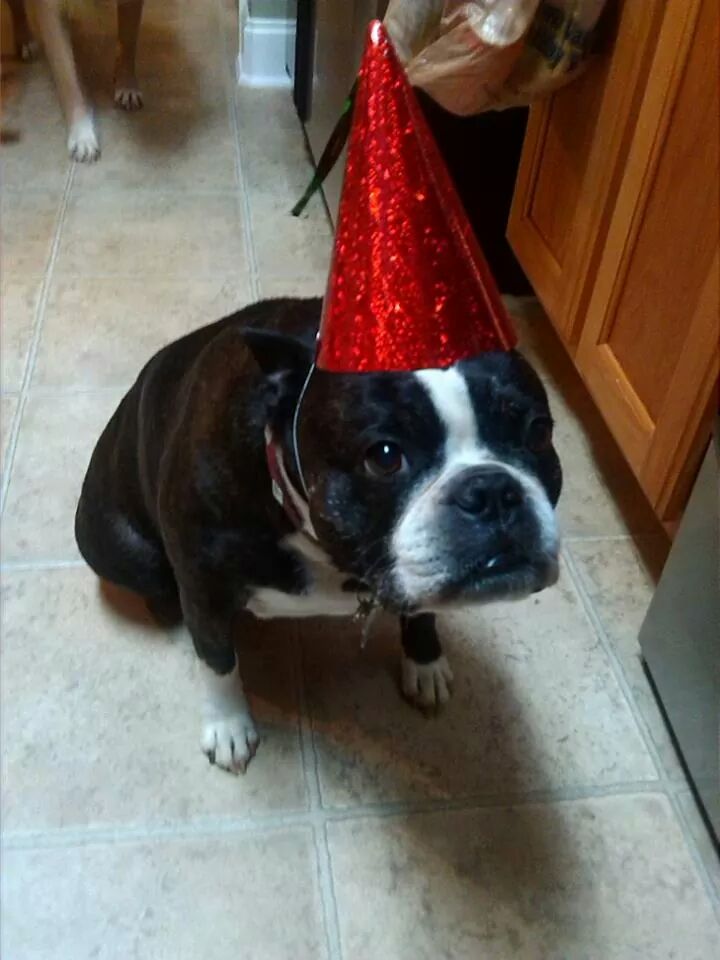
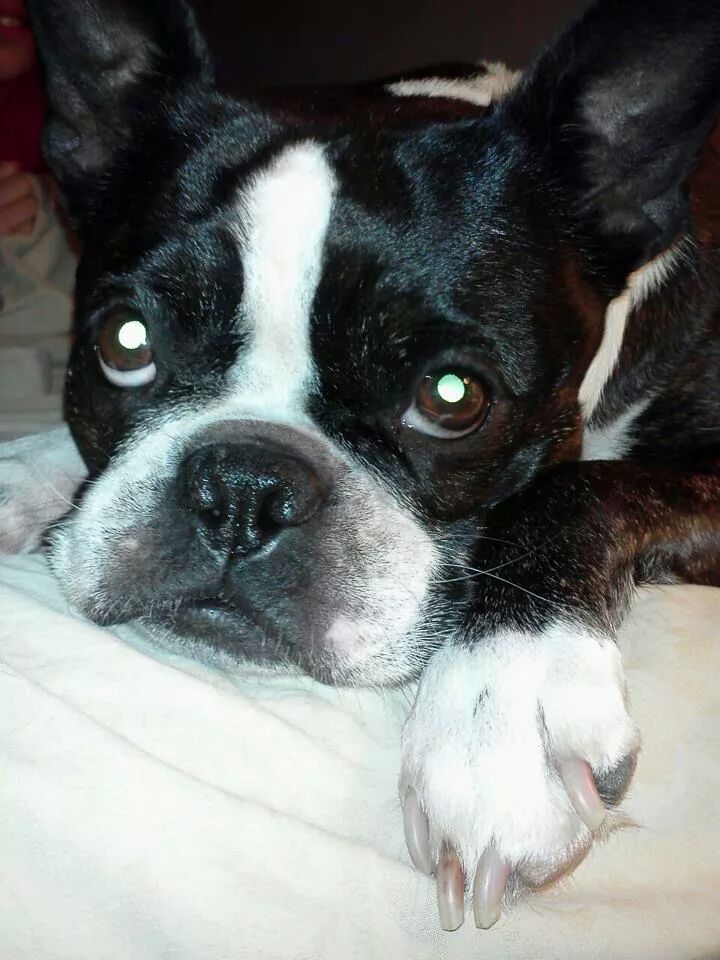
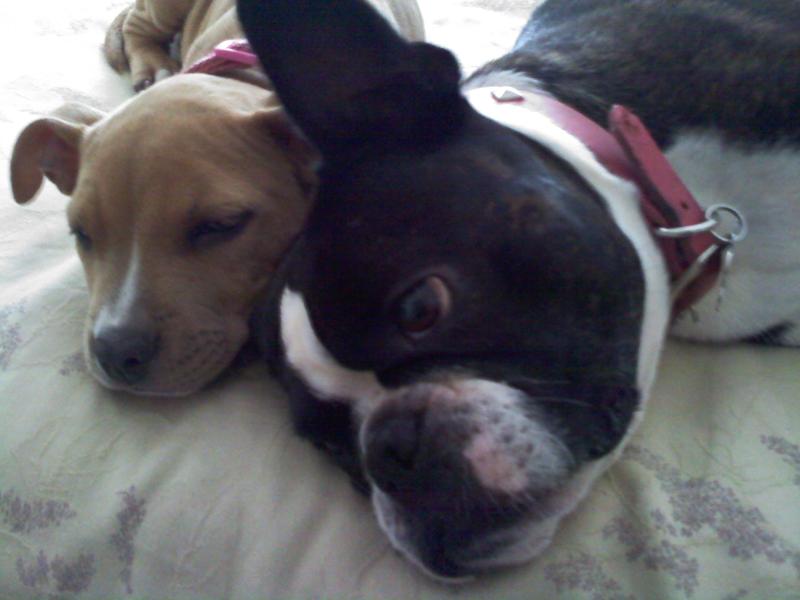
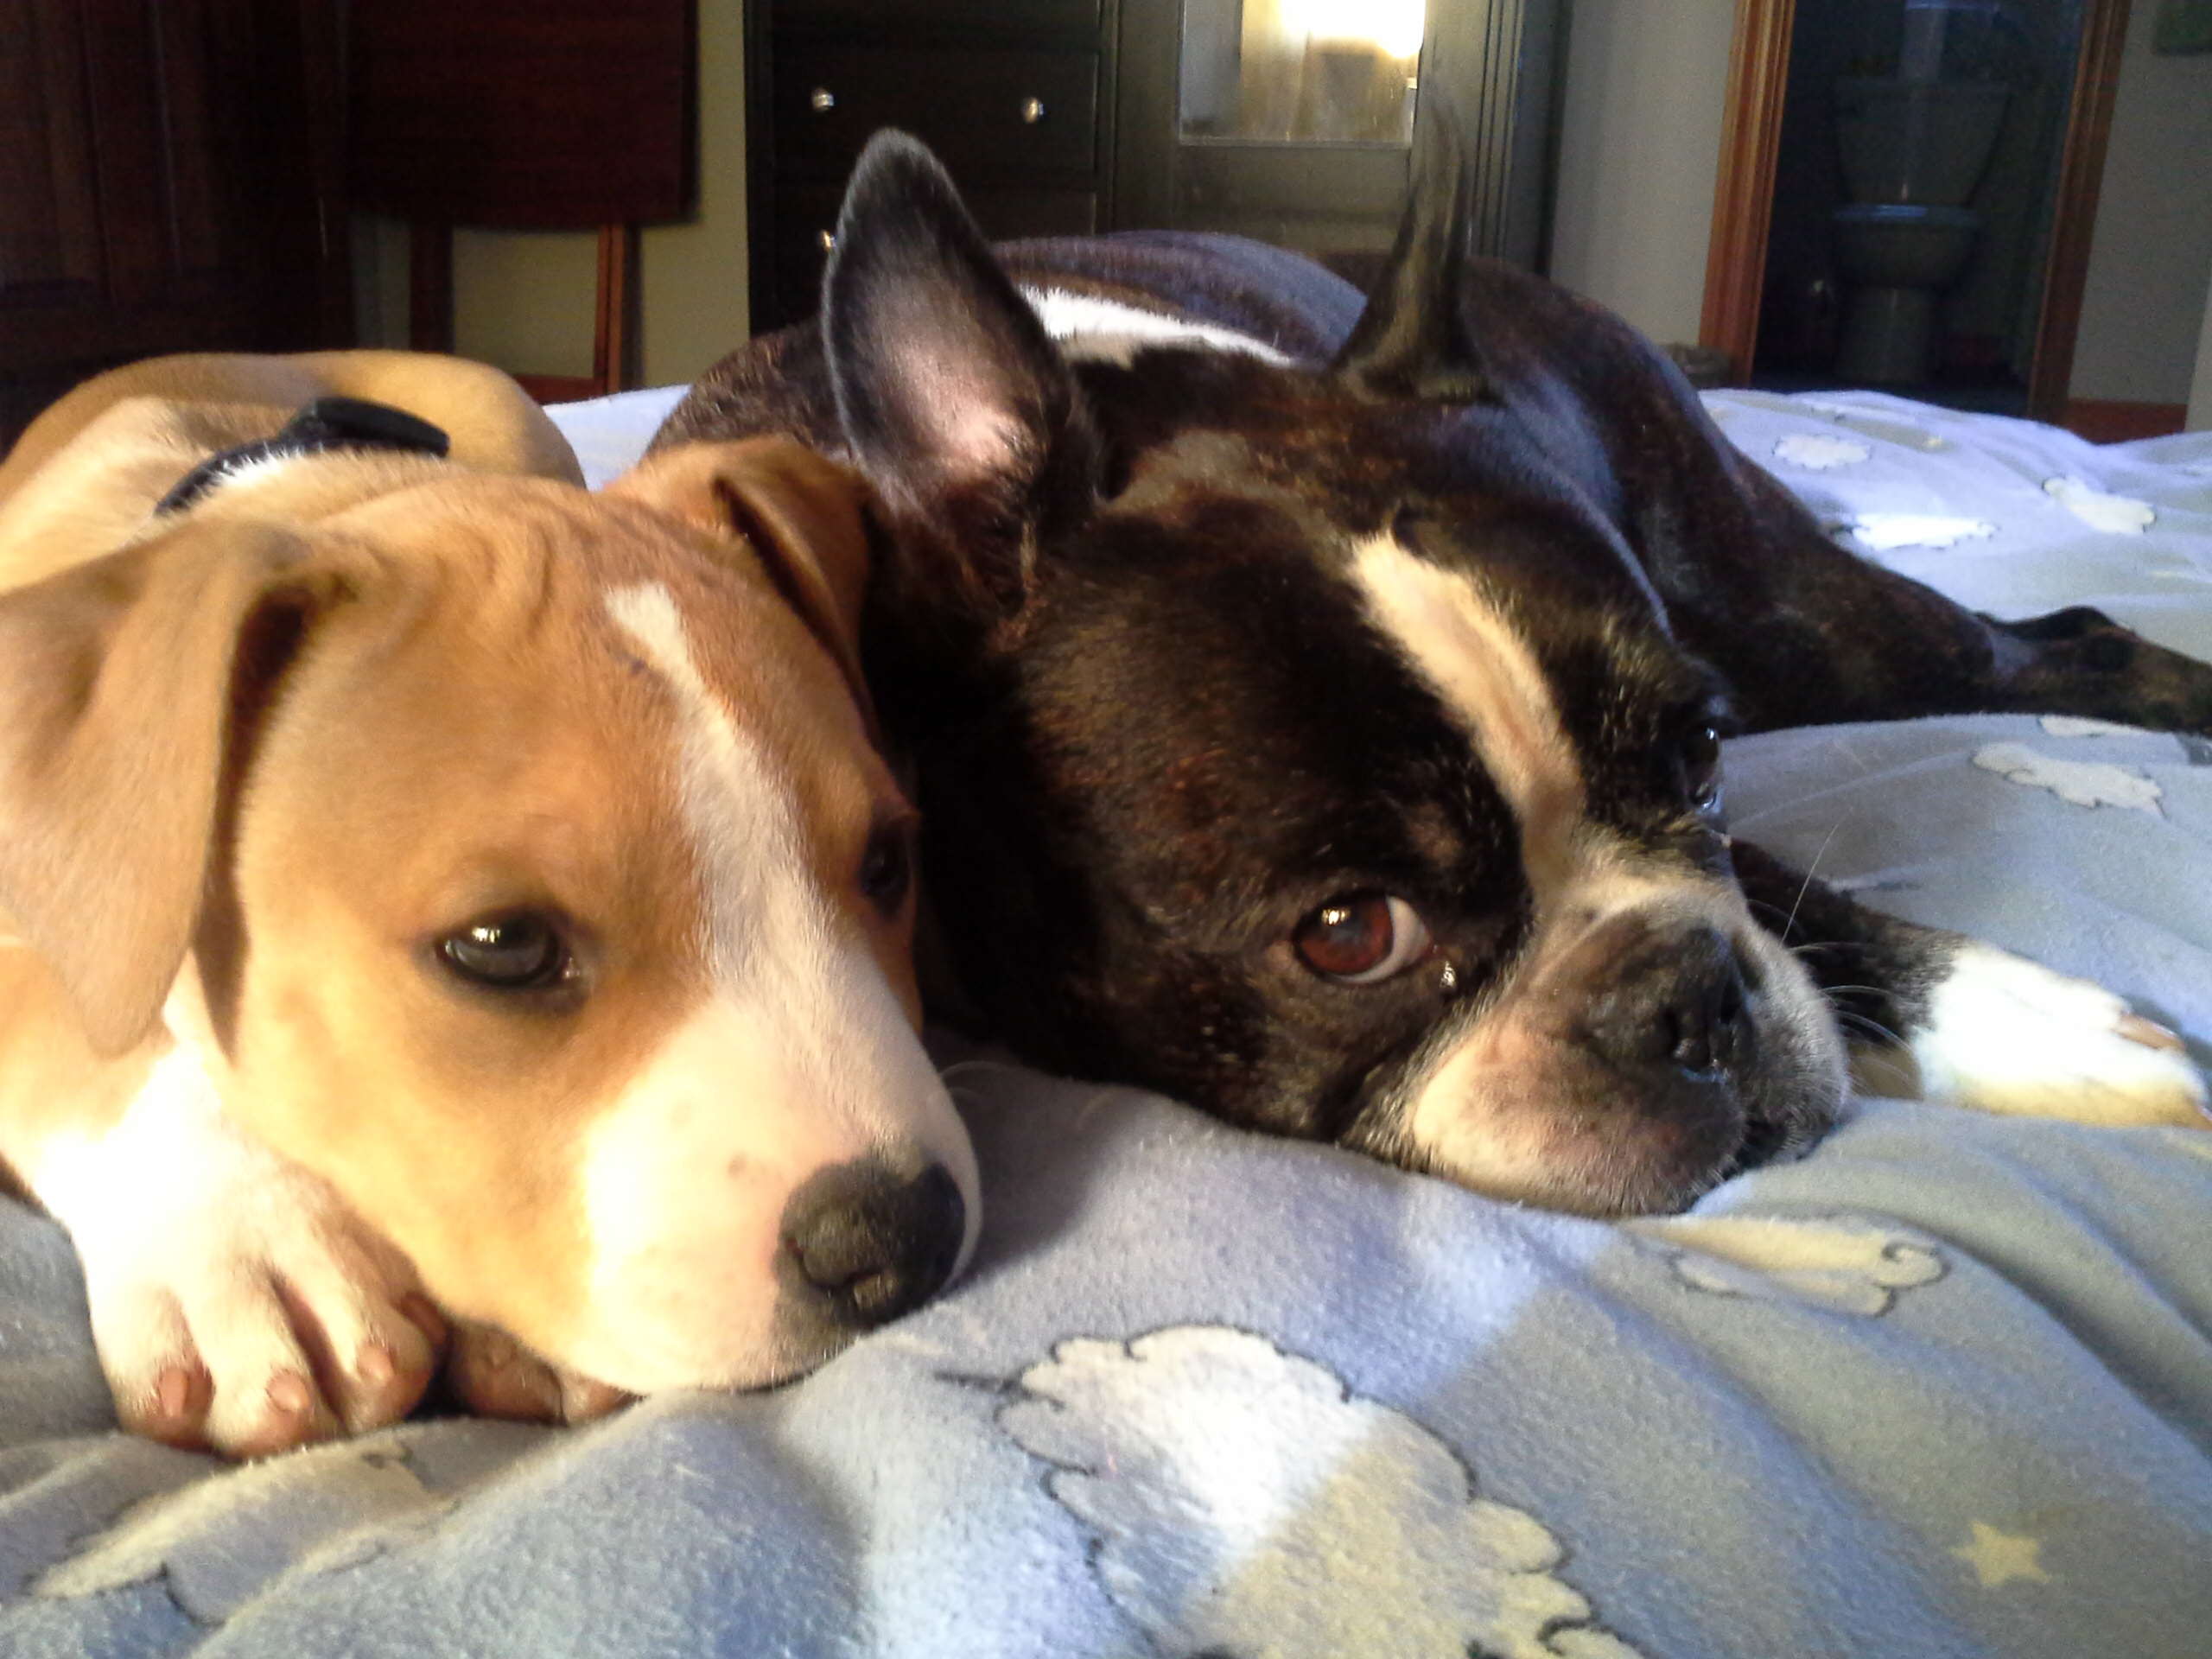
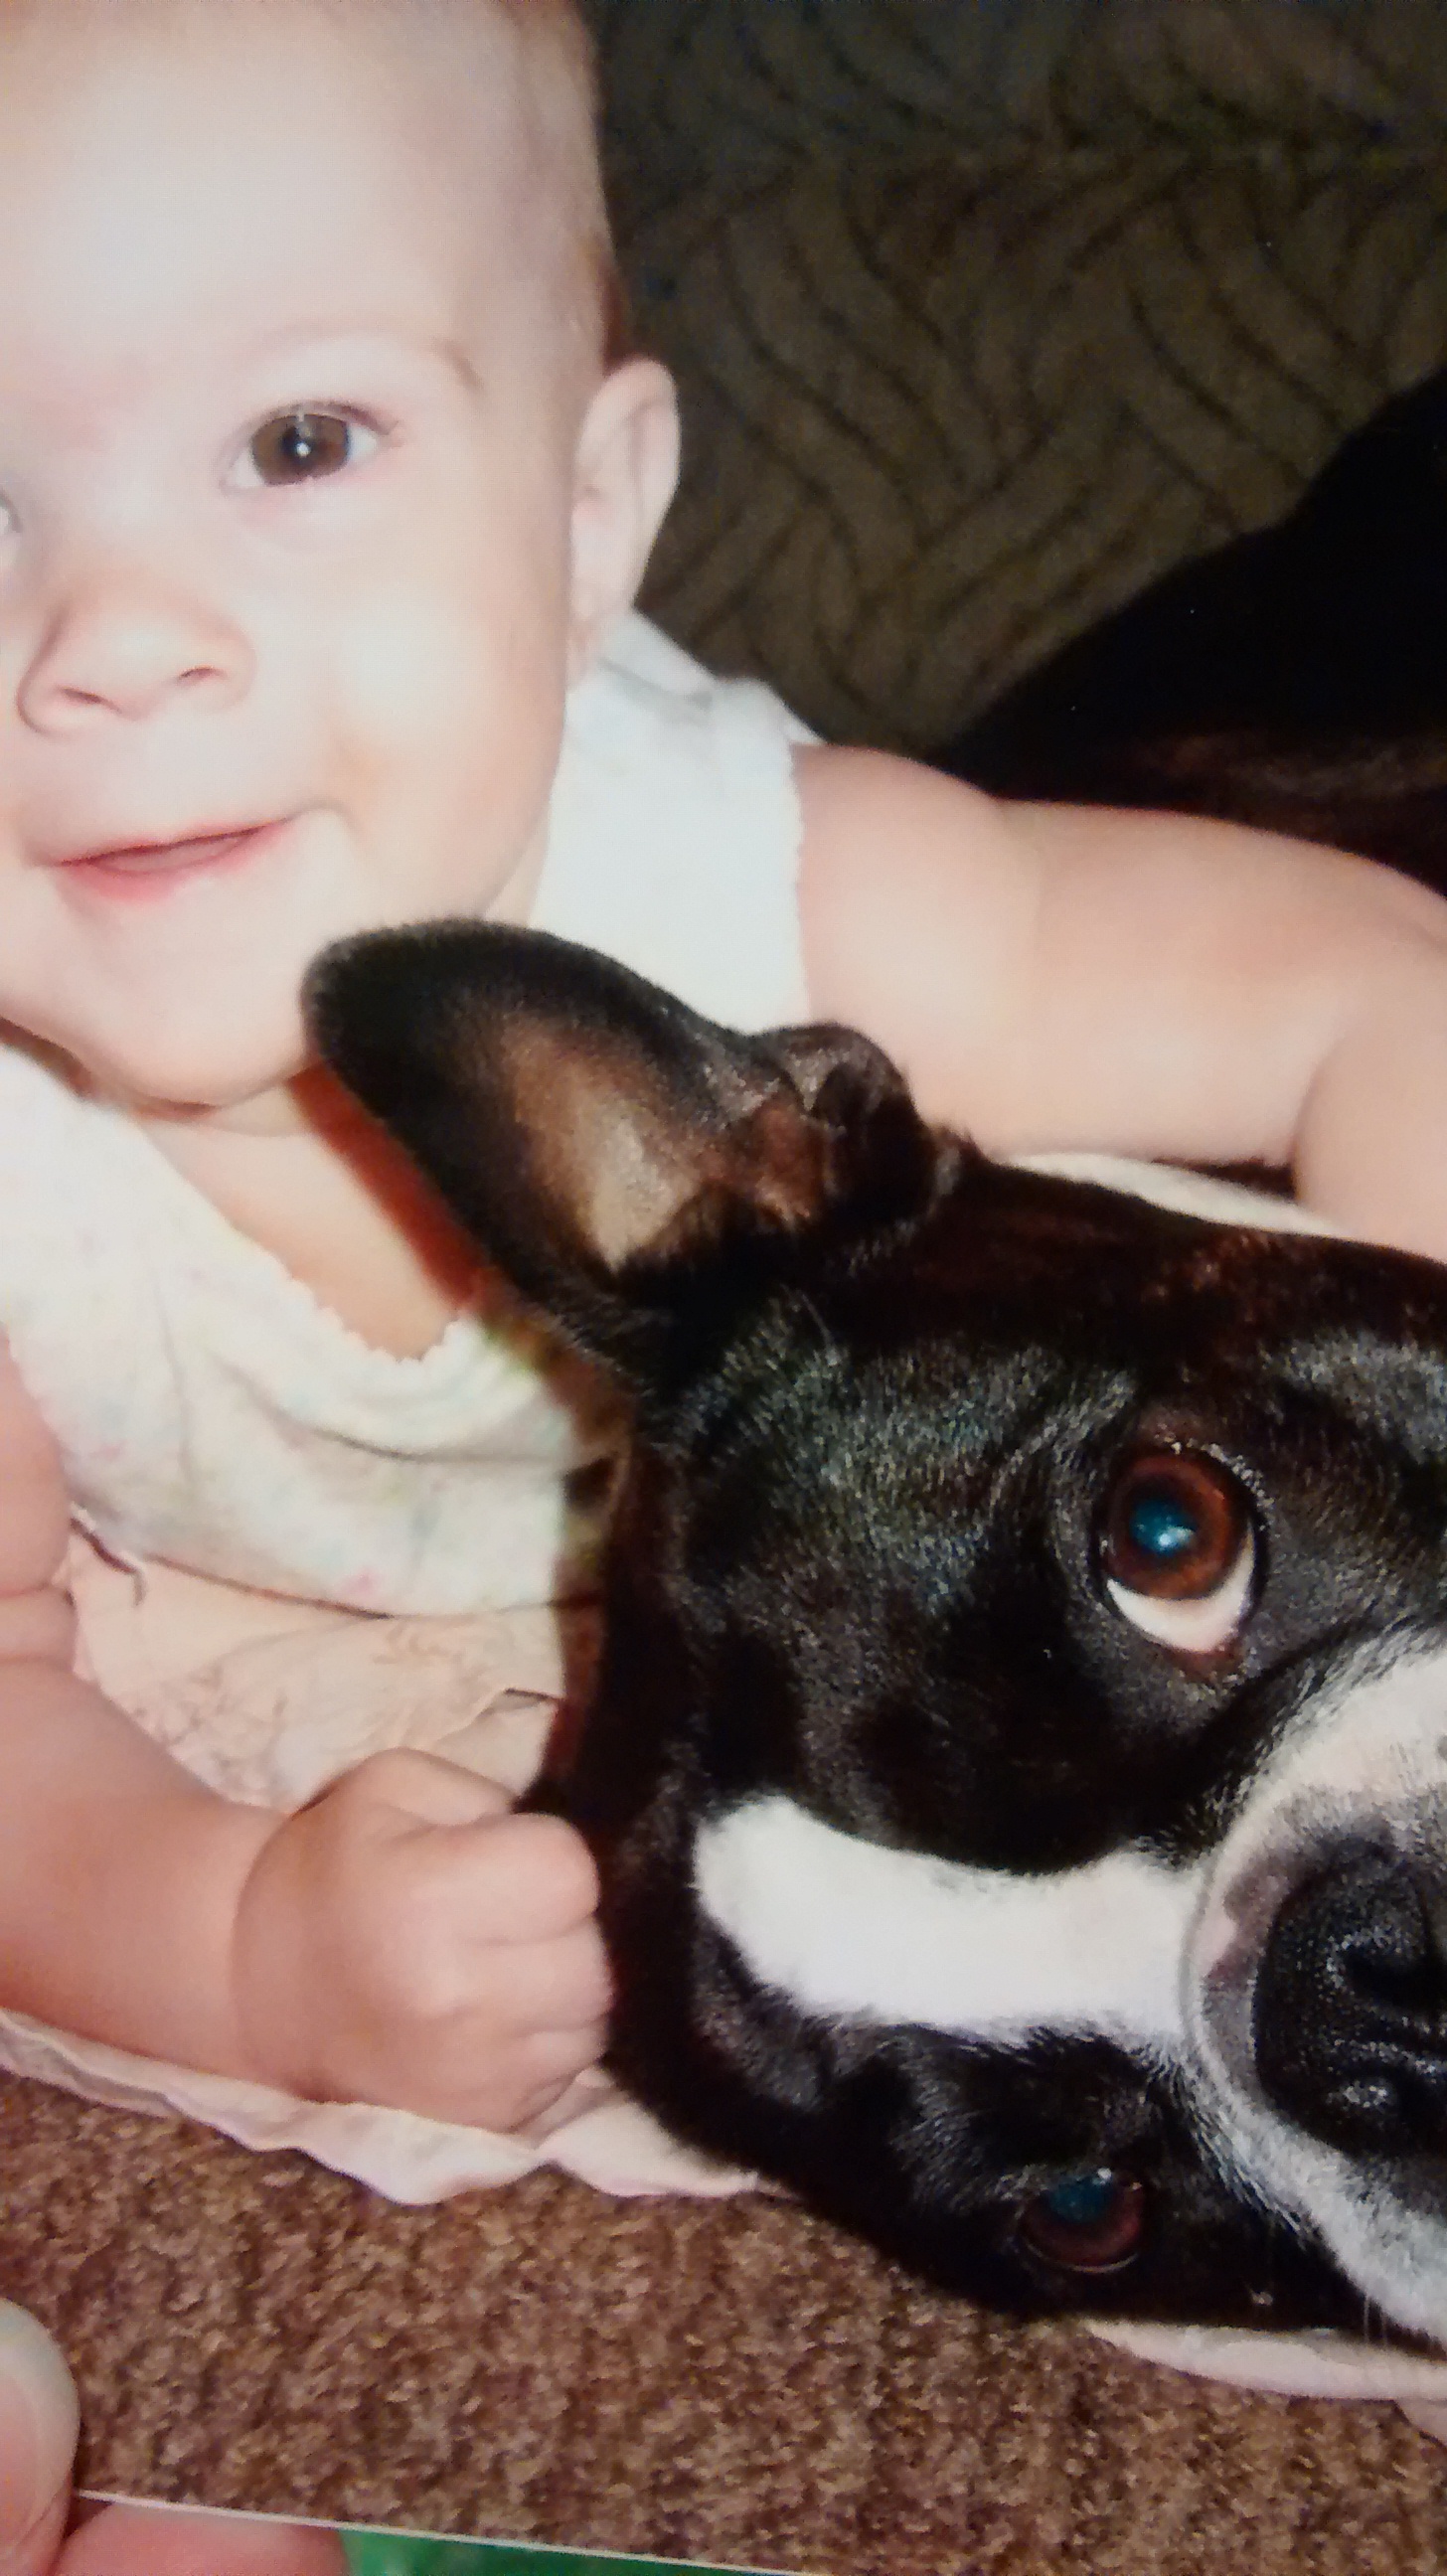
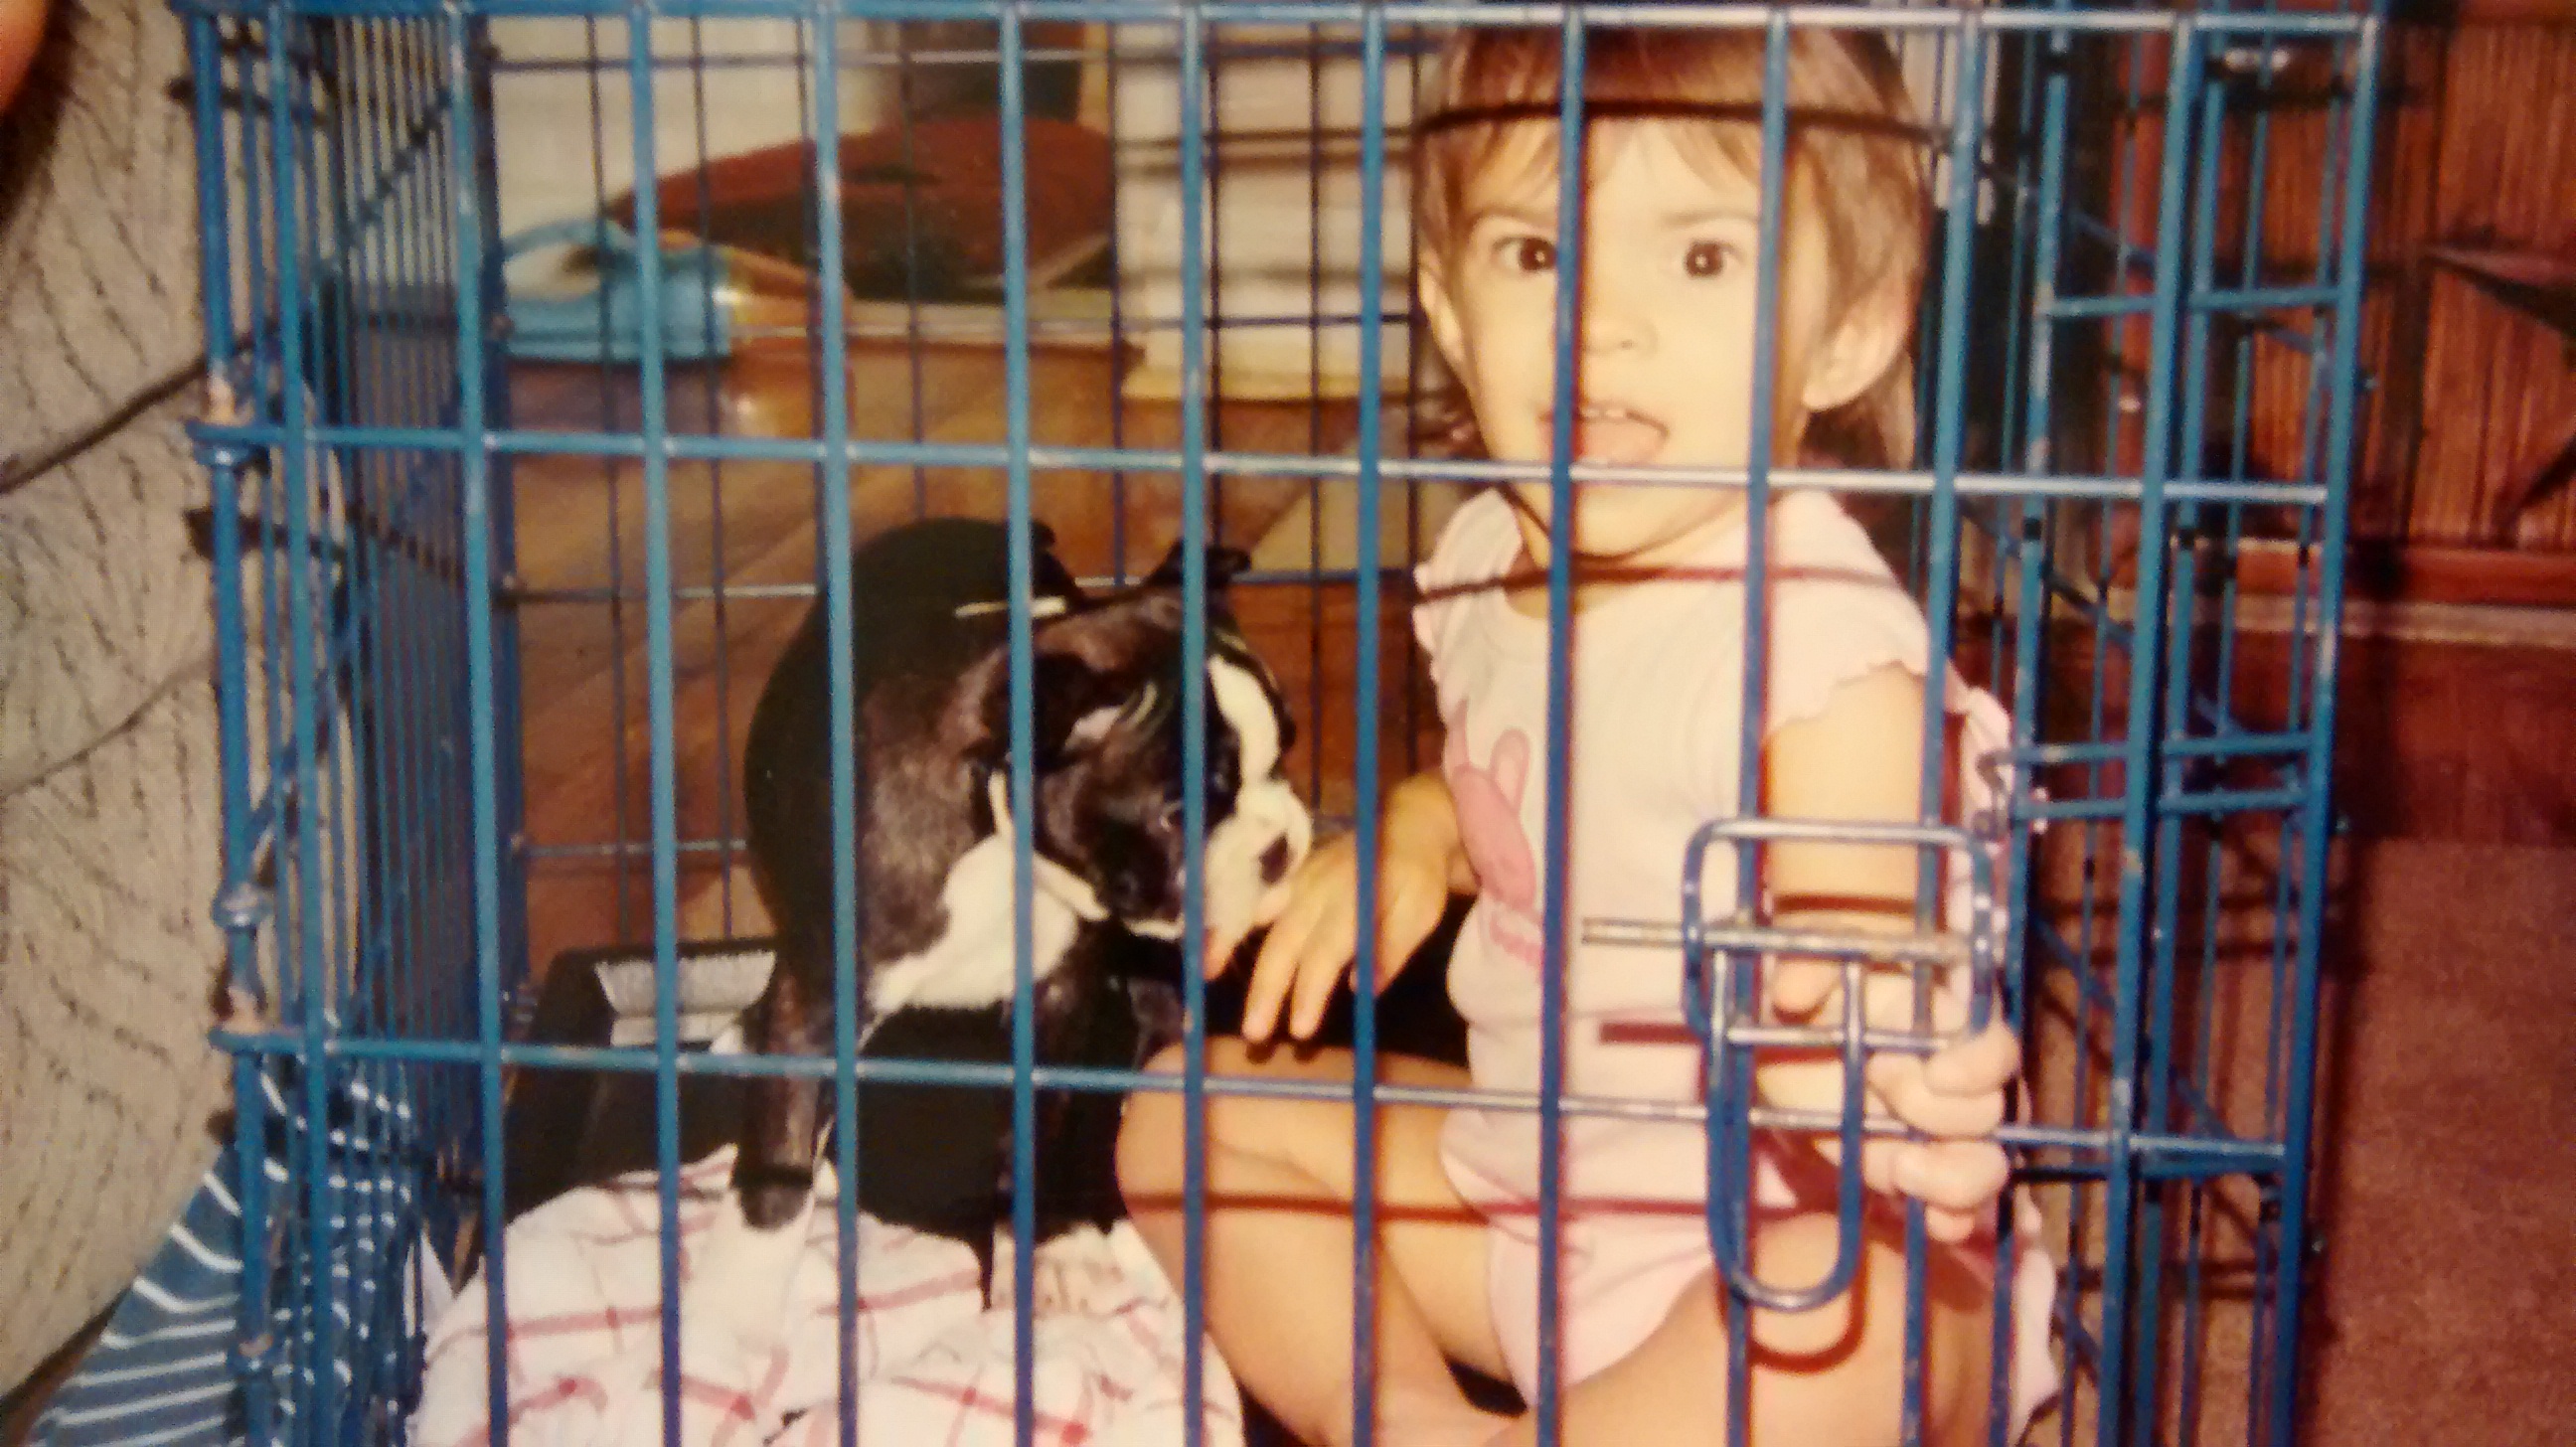
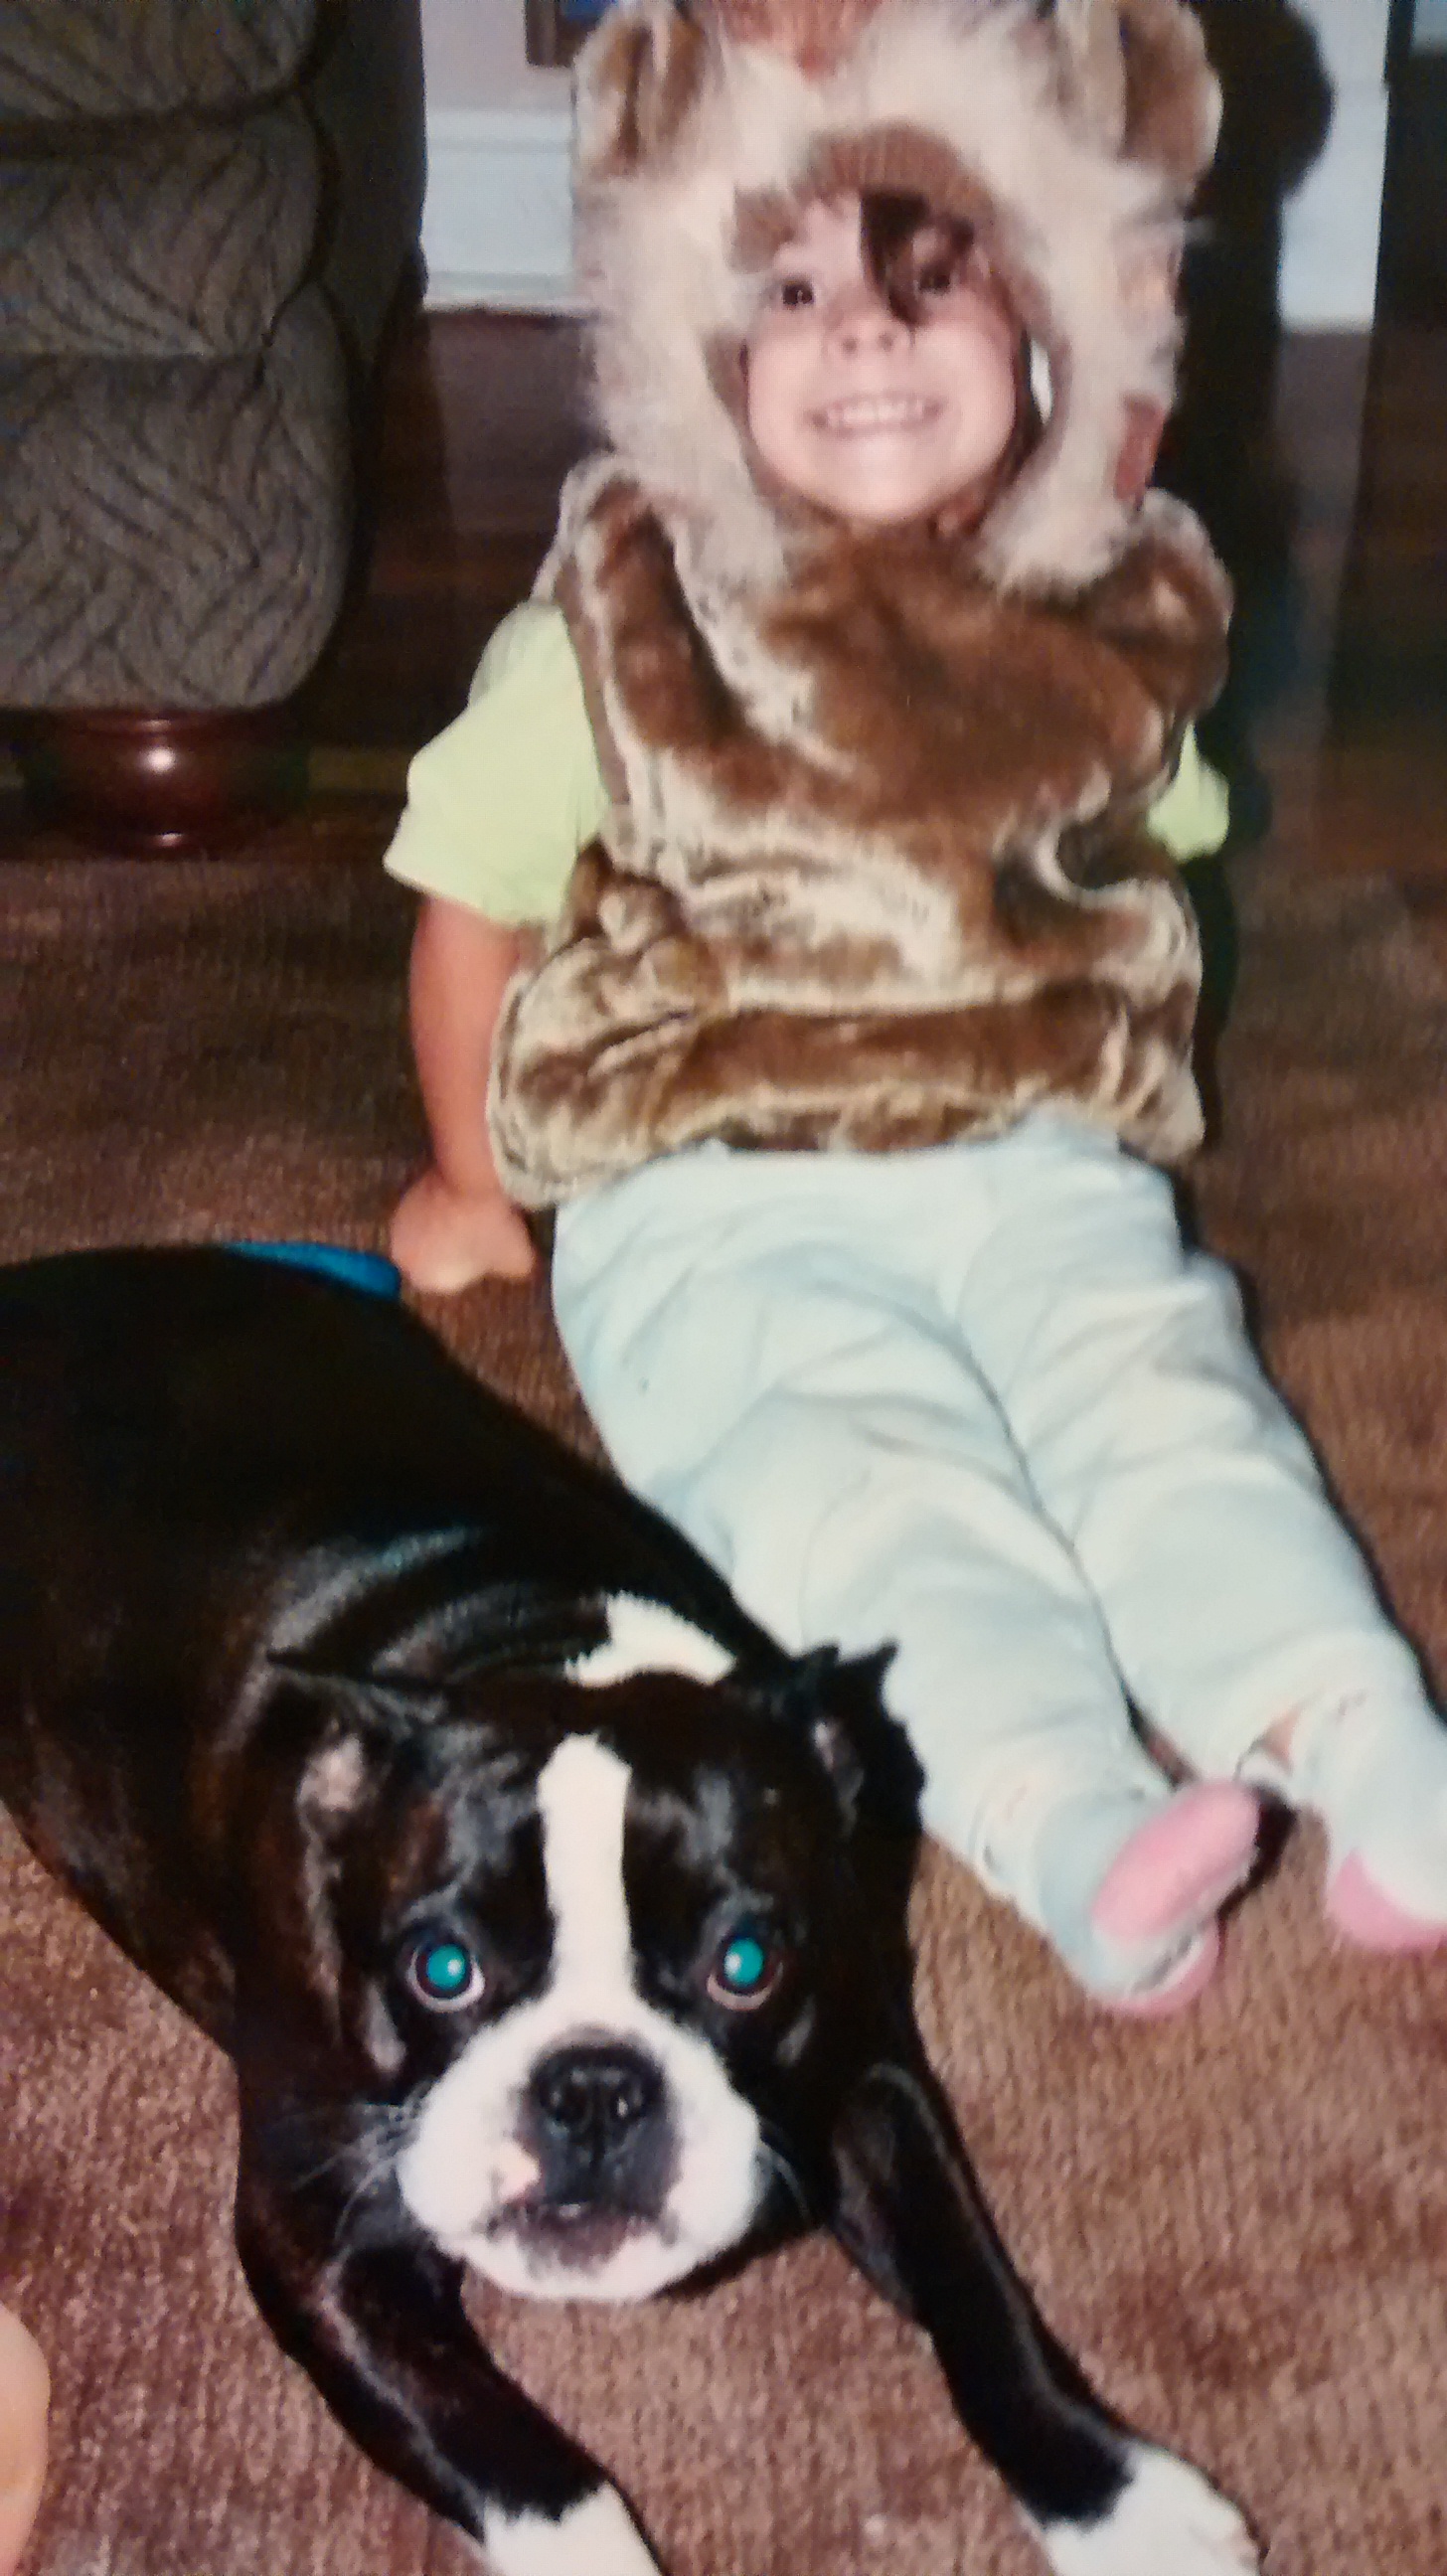
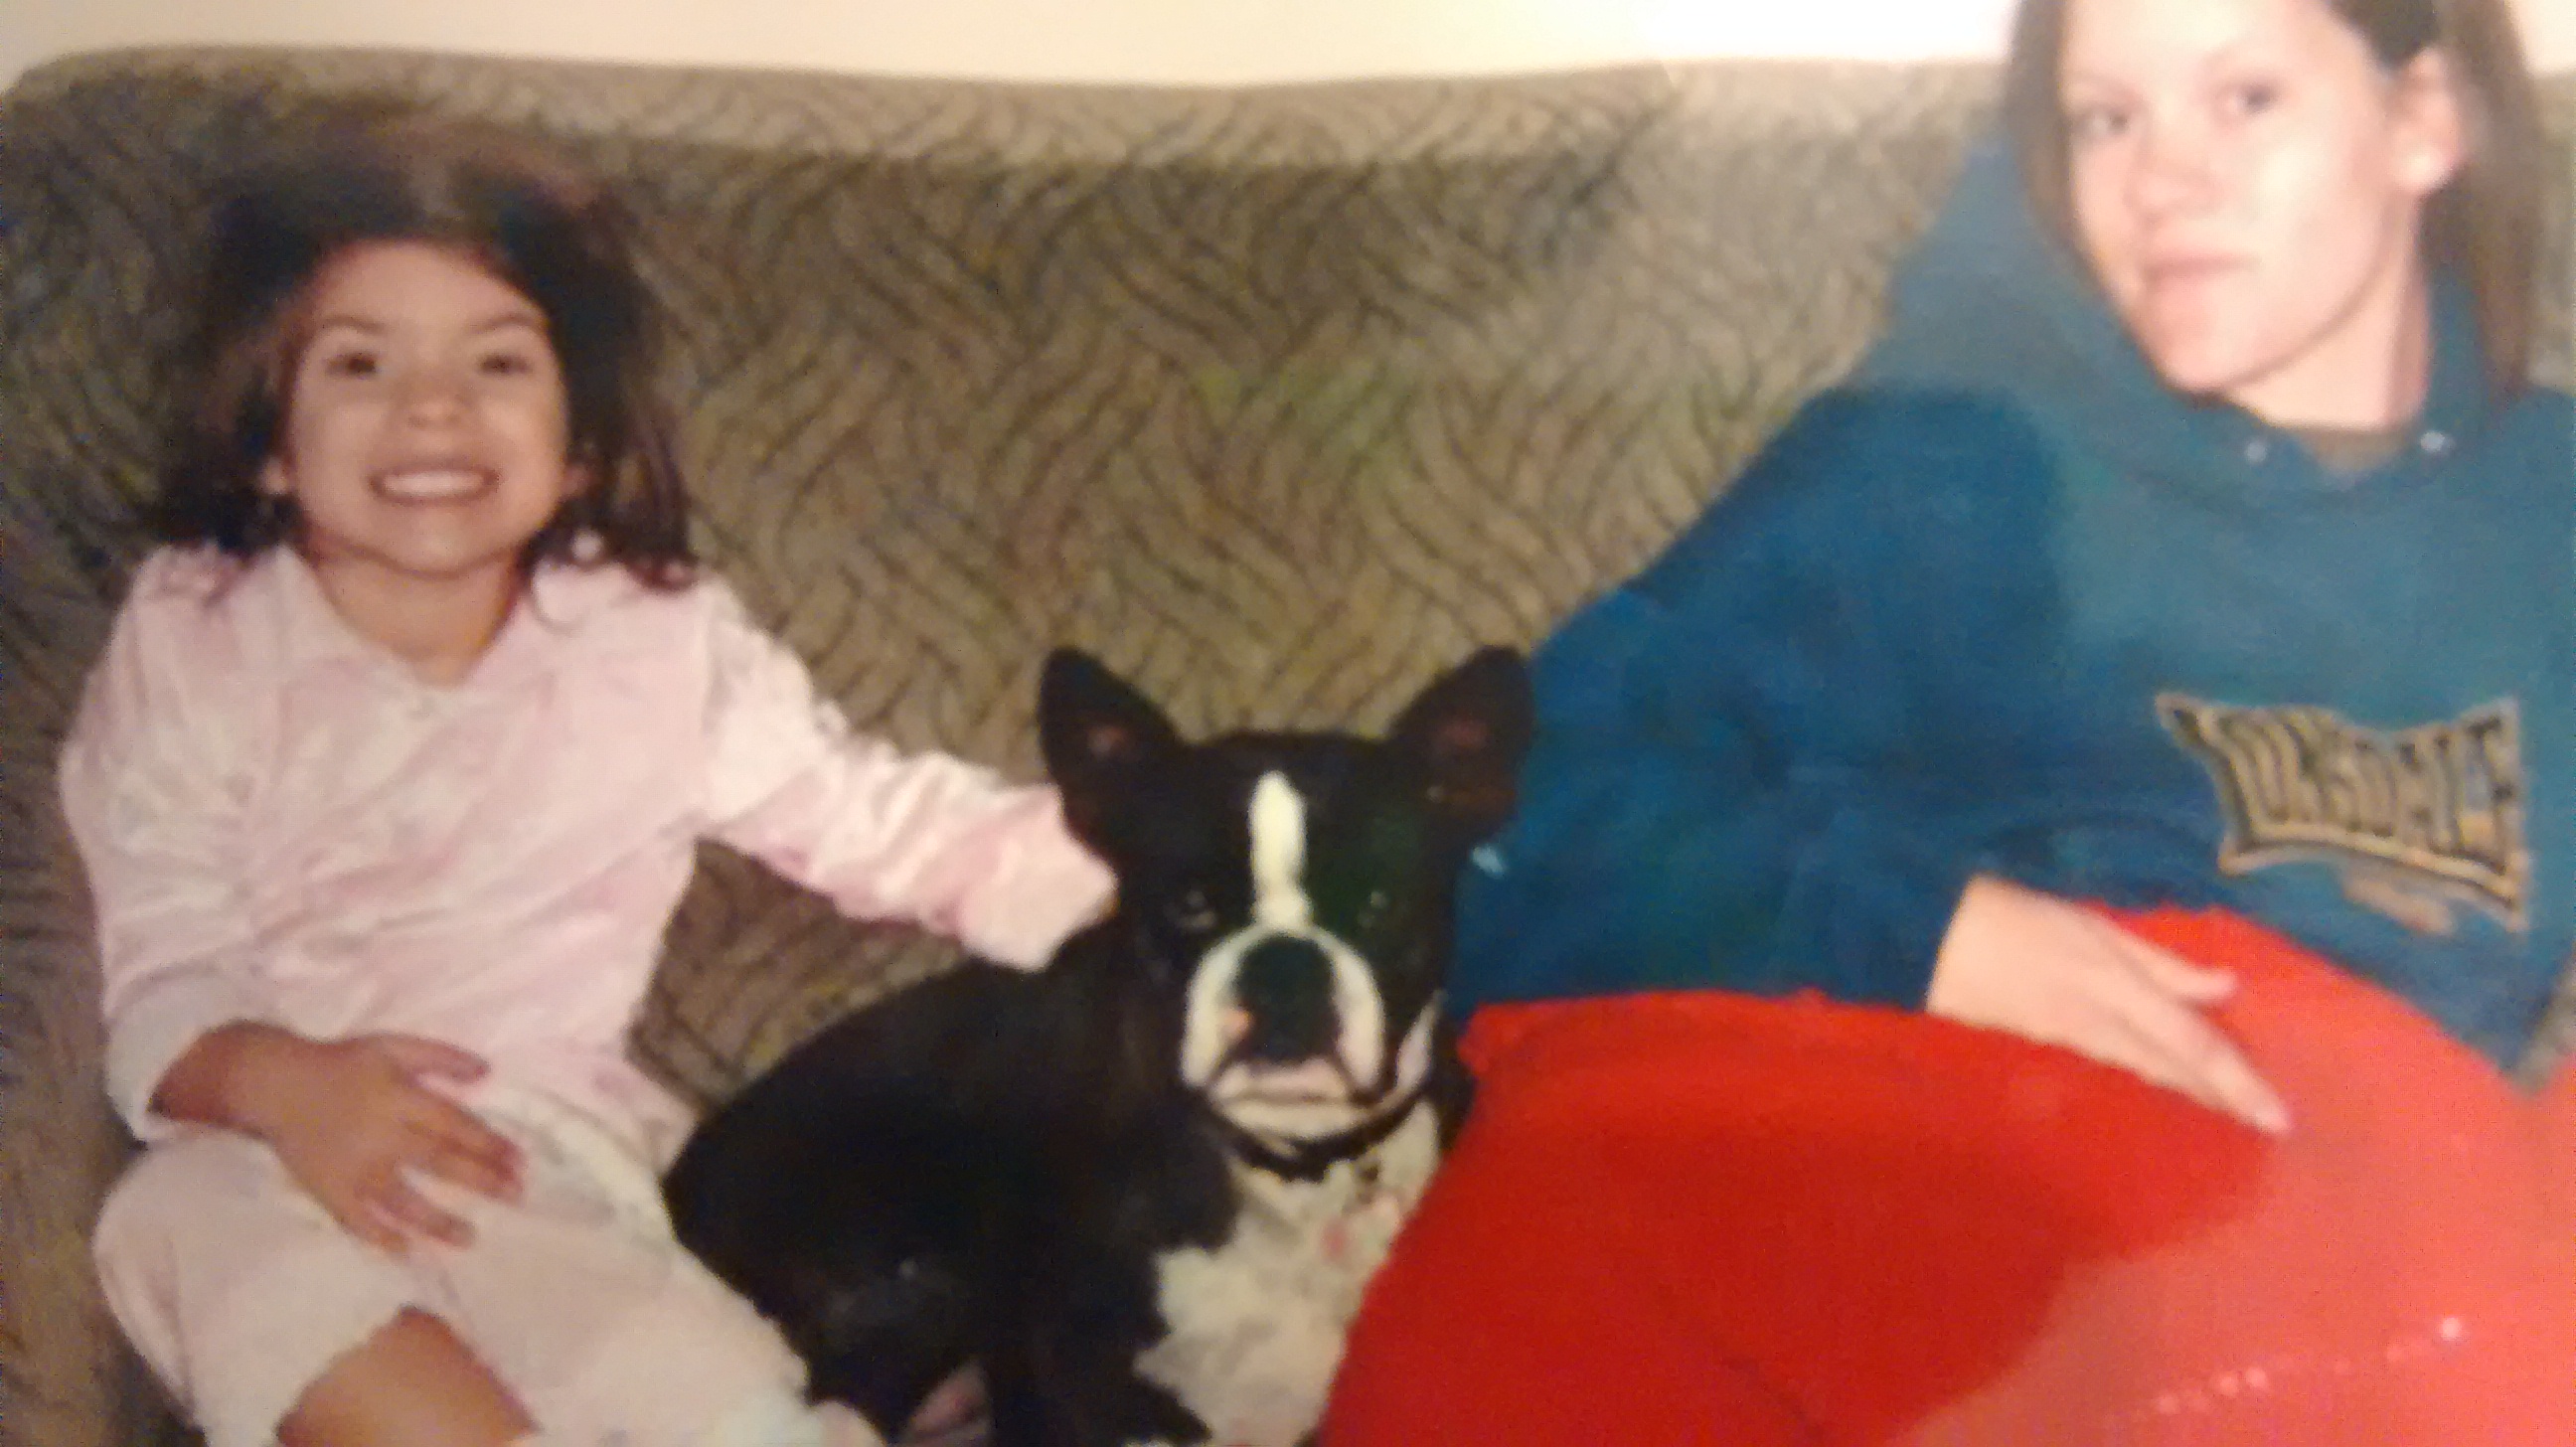
The truth is, she was not just a dog. She was my partner. EVERY DAY. FOR ELEVEN YEARS. She relied on me, and I relied on her. She was my responsibility and I was hers. I had to feed her and care for her, every day. And she had to show me how much she loved me and follow me around to make sure I was safe, every day. I have spent more time with her than I have with my own children and my husband. She was always there. ALWAYS. I’m not speaking metaphorically. She was literally ALWAYS there. Even if I wasn’t physically with her, she was at home thinking of me and wondering when I would come back to her so she could watch over me again, and wag her tail and show me she loved me. ALWAYS.

I realized that even after death she was still with me. In my mind. In my memories. Those memories will never leave me. Even if I wanted them to. She would always be there, just like when she was alive. I know, I’m contradicting what I said. But not really. Her memory is in my head and it makes my heart ache for that piece it lost when she died. Does that make sense? I don’t carry her in my heart. I carry her in my head and my heart hurts for her. There is no romance in that.

It has been exactly one month since Bonnie died. I still cry, pretty much daily. But now its a sudden bust of sadness that comes unexpectedly. From nowhere a moan will come from me and I will weep, for no reason at all. And it leaves as quickly as it came. I don’t know why. Nothing triggers it,  but everything triggers it. The memory of her intertwines with whatever it is I’m doing at the moment and reminds me of my aching heart.

I know that Bonnie was “just a dog”. An animal. My brain knows that. But my brain is the one that keeps reminding my heart of its loss. Logic is causing my sadness. So, I stopped feeling foolish for my sadness. And I don’t care if people think I should “be over it”. And she was not “just a dog”.

I know that one day I won’t cry from the hurt of the missing piece of my heart. My heart will learn to function without that part. But I will never view Bonnie as “just a dog” and my loss is real. Please don’t ever think any less of it. Please don’t ever think that there is a loss that is worse than mine that I could compare it to. I know there are terrible tragedies that would hurt far more than losing a dog, but non the less, losing any size piece of your heart is an important loss and it is painful.

She will be waiting for me in the meadow, along with the other pieces of my heart that are missing. And I will be whole again. I know this is true because both my heart and my brain tell me it is.

image (13)


Bonnie is in Puppy Heaven

The time is drawing near for my sweet Bonnie girl.
She has been battling lymphoma for 6 months now as I talk about in the Rainbow Bridge post.
She told me that she was ready to leave soon.
She was laying on the hardwood floor. Her breathing was heavy. She looked at me and I could see it in her eyes. She was uncomfortable.
I lay down on the floor beside her. My cheek on the cold wood floors, the same as hers. I admired her white fur peppered through her black. Her lips puddled on the floor under her head. Her tiny nose. Tears fell from mine.
I ran my fingers over her nape. This is her favorite spot for a good scratch. I pushed my fingers down into her thick fur and gently began to scratch. Her eyes brightened for a moment. She struggled to stand then slowly walked away from me to the other side of the room and lay down heavily again. She did not want me to scratch her anymore.


image


I called the vet the next day. I fought back the tears and made an appointment for Bonnie’s euthanasia. The vet would come to our house in 4 days.
Now I had to tell the kids.
I loaded up on snacks and bought a couple movies. I knew I needed to distract them for the sadness. The first night would be hard but then they would have the weekend to spend with her and to prepare for her departure.
Having to explain to your child, that someone they love is leaving them, is very hard to do. Seeing their eyes well up with tears. Their little cries of utter sadness. It broke my heart.
The next day we took all the dogs on a ride to grandmas house. Bonnie loved to go for rides.
The girls swam in the pool. Honey ran laps around the pool and occasionally jumped in for a swim. Bonnie stayed to herself and rested. Grandma fed her homemade fudge. Everyone was tired by the end of the day.

image (1)
On the third day my husband and I walked the property to find Bonnie’s final resting place. It was early and the air was cool. Bonnie’s dad had the painful job of digging her grave. I’m lucky to have him. I couldn’t do it.
After lunch we took Bonnie for a ride to the pet store. We bought her a new collar and tag and some special treats. My youngest daughter bought her a cookie with her own money. She wanted to save it for Bonnie’s special day.


image (6) image (3) image (2)

On the way home we went through the drive thru for ice cream. Bonnie got a peanut butter blizzard. But she didn’t want it. She thought we were at the bank and that she would be getting a treat. The tellers always put a treat in the canisters for her. She watches them glide through the pneumatic tubes with her ears perked up.
Tomorrow we will take her to the bank.

image (4)
After dinner we wrote letters to Bonnie telling her how much we love her and how we will miss her. We also found a sheet to bury her in. We wrote notes on the sheet too.

image (5)
None of us want to talk about our Bonnie girl leaving us but I can see that it helps.
For me, its a relief to talk about it. I have kept her illness a secret for months. I’ve ran all these scenarios through my head a hundred times. I’ve dreaded the idea of telling my children the news and seeing them being sad. But to finally be facing that fear, its almost joyful. Its weighed so heavy on my heart.
On the 4th day Annie gave Bonnie the treat she bought her, for breakfast.

image (7)
We went for a ride to the bank drive through. I put a note in the canister.
“Please send treats. My dog Bonnie loves coming to the bank for treats. She’s going to puppy heaven today”.
I could see the sad looks on their faces.
Bonnie’s ears perked up as she watched the canister glide through the pneumatic tube. She climbed into my lap excitedly.
They sent her 4 big treats. She scarfed them down.

image (8)
I drove home extra slow. It was Bonnie’s last ride. I turned the AC up and rolled the windows down for her. She stuck her face in the breeze. Taking deep breaths. She watched the sounds pass by. Sneezing occasionally. Panting heavy. This was her favorite thing to do.

image (9)
When we got home I gave her a bath. She wasn’t crazy about baths, but I wanted her to look her best when she got to puppy heaven.
Then we painted her nails hot pink. We put her new collar and tag on her. I don’t think she cared about any of it. But she would do anything for me. She looked great.

image (10) image (11)
I prepared the treats to keep the other dogs busy while the vet was visiting. Two almost empty peanut butter jars and two toy balls that dispense treats when rolled the right way. I sat them by the back door, ready to thrown them out when the time was right.
We decided that Bonnie should be put to sleep where she is most comfortable. She has been spending most of her time on our bedroom floor. Its cool in there, and quiet.
I cleaned the room up. I swept and put the nice bed spread on the bed.
Then we waited. If it weren’t for the incredibly sad event to take place we would almost be excited. I think we were all ready to rip that bandaid off. The sadness had been hanging around for days. We took our last photos with her.

image (13)
The vet called to let us know she was on her way.
We put Bonnie’s last meal together. On a big cookie sheet we placed all her favorite treats and things she never had before. Some of my crock pot lasagna, bologna, grandmas homemade fudge, the dog treats we made for her, a bar of chocolate, the remainder of the cookie Annie bought her, and a bowl filled with her peanut butter blizzard she never ate. We also had saved a Smoked butt bone for her.

image (12)
We brought her in our room and set out the buffet. She went straight for my lasagna, then the bologna, the grandmas fudge and homemade treats. She was loving it all. We brought her more lasagna and bologna. Soon enough she laid down. Her belly was filled. That’s when we gave her the smoked bone. She loved it. She grasped it between her two front paws and gnawed at all the bits of meat.

image (14)
The vet arrived. I put the two other dogs on the back porch with their treats. They were totally distracted.
The tears started to fill our eyes as soon as the doctor came in the house. We chatted for a minute. She told us that Bonnie had lived twice as long as the average dog does after diagnosis of lymphoma. Bonnie never quits. She hung on for us.
We went in the bedroom. Bonnie was standing there waiting at the door. She knew we had a guest. She walked up to the doc. Her little stub for a tail wagging away. The vet reached down and pet her. Telling her how pretty she was. Bonnie drank in the scratches and compliments.
The vet sat her bag down. She examined Bonnie gently. Speaking to her softly. “Oh, your a good girl aren’t you?”.
Bonnie laid down and went back to work on that bone.

image (15)
The vet gave her a sedative. We pet Bonnie and talked to her as she slowed down on the bone. We told her it was OK to sleep. Gently scratching her and caressing her fur. Her breathing got heavy and she dropped her bone.
I crawled down onto the floor, looking her in the eyes.
” Momma loves you, good girl. You are the best dog in the whole world. You did such a good job, everyday”. Crying heavily, I traced the wrinkles of her face, her ears, her lips, her little nose. Everyone was crying. Each of the girls came down and kissed her head and said good bye to her.         I told the vet we were ready as soon as Bonnie was. As I felt her warm fur for the last time, the Doctor gave her the final shot. Bonnie’s heavy breathing stopped. My baby was finally at peace. The sudden realization that life had left her body hit me like a rock. I wept.

The vet softly said goodbye and let herself out.

We cried and held her. We pet her. I rubbed her ears. We all sat on the floor and told stories about the silly things Bonnie did in life and how she was doing her favorite things in Heaven now. We loved on her for one last time.

We brought our two other dogs inside the room to smell her and see that she was gone and not just missing. They seemed more interested in the smells the vet had brought in with her rather than Bonnie. I suppose they were used to her laying around sleeping. Maple did seem concerned about me as I wept over Bonnie.Sticking her hose between Bonnie and I and licking my tears; her tail wagging heavily.

We wrapped her in the sheet we made for her, tucking her feet close to her body like a newborn. We all walked together to her grave. We read our letters to her. We left special things with her. We said goodbye.

image (16)

Of course there was crying and a heaviness in our home. But there was also a great sense of relief. We knew that she was in puppy heaven and no longer in pain, and we were actually happy for her, in that sense.

Its the every day routine that is hard. Not seeing her, when she should be there. Making two dog bowls of food instead of three. Being careful not to step on her in the darkness of night because her fur blends so well, but shes not there.  The sound of her snoring is gone. Its quiet. Our home is missing something.

IMG_302126717688470


Rest in peace Old Lady, you were the best dog in the whole world, and you were very loved.

IMG_302141411194612 IMG_302206583510629 IMG_302117226647121 IMG_302096881223951 (1) IMG_302220466576612 IMG_302066029734275 (1) IMG_302324424799958 IMG_302281704028203 IMG_302199235848495 IMG_302149139081067 IMG_302186018162771 IMG_302267774403313 IMG_302345642367763 (2) IMG_302172704266371 (1) IMG_302022803691740 IMG_302110076093633 IMG_302066029734275 Andrea s Phone Pics 2010 1449 20140216_162537 IMG_20140728_214738078 IMG_20140728_214801573 IMG_20140728_213246851 IMG_20140728_213144940 IMG_20140728_214817697 IMG_20140728_214750509 IMG_20140728_214714721 IMG_20140728_213053756 IMG_20140728_214727350 IMG_20140728_214656337 IMG_20140728_214618676

Snow2010 029 (1)

Swinging Chickens! DIY Chicken Toy.

Believe it or not, there is a chicken swing on the market. Once the chickens  get used to the swing, they seem to really enjoy it. But I was not willing to pay for something I could make myself!

What you need:
3″+/- diameter, straight(ish) Branch
Outdoor rope
Drill
Drill bit large enough to accommodate the rope

image

Here’s how to do it:
Drill a hole, about an inch from the end of each end of the branch. Try to keep them linear so the branch will hang straight.

image

Insert rope through drilled hole. Tie a tight knot on bottom side of branch.

image

I like to melt the fibers of the rope just a bit so be sure the knot doesn’t slip.

image

Leave the rope long enough to hang your swing about 6″ from the ground PLUS at least 3 feet for tying the swing to the desired branch.

Repeat this process on the other side of the branch. You may need to melt the threads at the end of the rope to help it get through the drilled holes easily.

Tie the swing to the branch. Here’s how I did it, but with 3 loops rather than 4.

image

Trim the rope with about 2″ of excess. Melt the end of the rope threads to give it a nice finish.

image

image

image

I bribed my girls to try out the swing by tying a bunch of lemon balm to the ropes of the swing. They weren’t buying it.

image

Update:
Today was day 2 of the swing introduction. I didn’t see the girls on the swing but I did see them scratching the ground around it. Later in the day I noticed the lemon balm missing. Someone had to climb up there to get it!

Update:
Today is day 4. They are finally giving it a try!
image

Easy Herb Gelatin Treats for Chickens (or humans, I guess!)

With the heat on the rise I have been looking for ways to help keep my small flock cool.

Fresh Eggs Daily had a great post on Beating the Heat. This is my favorite chicken site. Tons of information. The post gave me an idea. I could make Homemade Healthy Gummie Snacks for my chickens! They were such a hit with the kids, the chickens were bound to love them!

I found out that not only could chickens eat gelatin, but gelatin is actually good for them. Just like in humans, gelatin helps support health hair, skin and nails. It is also aids digestion and soothes the digestive tract. Sounds like a winning combo for chickens. And to clarify, gelatin is made form the bones and hooves of bovine. It is not made from chicken products. No cannibalism here.

You can make these treats from the herb of your choice. Or you could not use herbs at all. Maybe just use fruit. Or a fruit herb combo. How ever you make them this is a healthy treat that can help your chicken keep its cool.

IMG_20140609_081118939 (1)

Ingredients:

2 cups herbal infusion (How to make a Water Infusion)

1 cup cold water, fruit juice, or fruit puree (I used strawberries and blackberries (this is a great opportunity to use up that frost bitten fruit you have in the freezer ;))).

4 packs  unflavored 1/4 oz gelatin (you buy it here or any grocery store in the Jello section)

First thing you need to do is make an herbal infusion. Since I want to cool my chickens I decided to go with mint. It has natural cooling properties. Since mint is a strong herb, I only filled my infusion jar 1/4 of the way.

Bring your finished infusion to a boil in a 2 quart pot.

Remove from heat.

Slowly add gelatin while mixing.

Blend with an immersion blender until smooth. If you don’t have an immersion blender, just blend it by hand with a wisk or fork. I love my immersion blender and I highly recommend one. You can buy the one I have here or at walmart.

Add cold water juice (or fruit juice or puree).

Blend until smooth.

Pour liquid into a greased, 3 qt 9×13 casserole dish.

Place casserole dish in fridge.

Allow to sit for 1-4 hours (or until firm).

Cut into squares the size of your choice. I like 1/2″ squares.

Serve to chickens.

Watch the chickens steal them from each other and chase each other for the last bit! They LOVE THEM! I tried them as well. I don’t prefer mint jello but I can tell you for sure it has that great cooling effect!

If you made  your own flavor and the chickens didn’t like it, you can put the cubes back into the pot and reheat them until liquid. Try adding something you know they love, like strawberries or bananas. Then re-pour, refrigerate and serve again. Have fun! Try new flavors and let me know which one your chickens like best!

Here is my flock enjoying their gelatin treat! Ravenous!

IMG_20140609_081233860 IMG_20140609_081235435 IMG_20140609_081239666 IMG_20140609_081242348

Look how sad my little Mango is. The girls stole all the treats! 😦


Make Your Own Citrus Coop Cleaner

Ingredients:

The peel of 2 oranges, or 3 lemons, or 4 limes, or maybe 1 grapefruit? I don’t eat grapefruit so you guess on that one.

White vinegar

1 quart mason jar or bigger. Use what you have, just try to use glass or food grade plastic. You could even use the vinegar bottle.

Place citrus peels into the container of your choice. I had left over orange peels from my Homemade Healthy Fruit Gummies recipe.

Leave the vinegar mixture to rest for about a month. Shake it occasionally.

Filter the vinegar into a spray bottle.

Use the citrus vinegar spray to clean your kitchen or to clean your coop when you are giving it that occasional deep clean.

This stuff smells fantastic and has all of the wonderful benefits of white vinegar.

I got this recipe from my favorite chicken website Fresh Eggs Daily. She added cinnamon sticks and vanilla to the vinegar and oranges before allowing it to rest. I bet that smelled amazing! If you haven’t checked out her site, it is worth your time. She has tons of chicken recipes and raises her chickens naturally with herbs. Lots of great tips.

Try making your own scent of citrus cleaner. Just remember to use White vinegar, a citrus and nothing sticky. How about Lime/Mint or Lemon and cloves? What recipe will you use? Please let me know how it turned out!

Building a Chicken Coop

1404100291398

Building my first chicken coop was a challenge. I had never build a structure before. I am also a tiny bit of a perfectionist and I detest when I make something to later wish I had done it differently. So I took a lot of time and put a lot of thought into how I wanted my chicken coop to work. I did research on What makes a good chicken coop. I drew up lots of plans, threw them away and drew more.

I had some supplies on hand already. I try to reuse/re-purpose items as much as possible. I hate wasting things, money included. I wanted this coop to be the best coop possible for the smallest amount of money.

I consider myself a handy person. I do much more than I used to before I got over my irrational fear of power tools, that most women seem to have. But I confess, I was nervous to build this coop.

All of my plans were thrown out the window when I found this at the thrift store.IMG_20140321_155910

I know, right!

Seriously, weeks of planning, OUT THE WINDOW.

Now some people, like my husband, would look at this armorer and think “Man, that is ugly!”. But a chicken person would go crazy once they saw the inside:IMG_20140321_165506-1BAM! How can you NOT see nesting boxes?!

My husband couldn’t see the potential but I went with it anyways. I redrew the plans and then I got to work!

Here it is painted. Still ugly??????IMG_20140411_172115

First things first, the foundation. I’m worried about predators around our homestead so I wanted my coop build up off the ground. I’m also, admittedly, cheap and decided that I wanted to use the fence as one of the walls of the coop (free wall!). These things helped me to decide that I wanted one roof for the entire coop and pen. Which gave me the base of my foundation.

I decided where I wanted to position the coop and installed the 4×4 posts. I had never installed posts before. I dug the post holes with a post hole digger, installed, leveled and braced the posts. Then cemented them in.

Proud of my post work.

Proud of my post work.

I measured the pitch I wanted for the roof and marked the angels on the posts. My husband cut them for me. After that I installed the support beams for the roof and floor.

The next step was the floor of the coop. It took a little finagling (because I built it off a crooked fence) but I got it done.

Then came the walls.  I had a few items I had been saving to use on the coop. I basically built the walls around the items. One was the face of an old kitchen cabinet I had found on the side of the road.

IMG_20140421_130409 (1)IMG_20140422_140512 (1)


I measured the width of the cabinet and installed two 2×4 posts that width apart from each other, from the floor of the coop to the ceiling, where I wanted the cabinet positioned.

I decided to spend a little extra money to have a good roof over the coop. We live in a heavily wooded ares and I was afraid of limbs and branches falling on the coop. I also only want to build this thing one time, so a good roof will keep it dry and help it last longer.

The roof was special ordered and I had to wait for it to come in before I would install the cabinet. It took about 2 weeks but it was well worth the wait. I installed the roof in about an hour by myself. I siliconed the screws to make a water tight seal.

Finally, the cabinet was moved into place. I tacked trim, to both the cabinet and the coop, around the connection point.

After all 4 walls were solid I climbed into the coop and stapled in bright aluminum bug screen and then stapled 1/4″ hardware cloth over it. I was sure to use heavy-duty staples and hammered them in to set them nicely. I them checked for any protruding nails or staples that my birds could possibly hurt themselves on and set them as well.

The final touches like safety hooks and a perch, for access to the nesting boxes, were added. As well as adding a door to the pen and enclosing the pen with chicken wire.

It took me about 2 weeks to build the coop and I have made a few improvements since then. This was a fantastic experience for me. I have always known that I could do anything I put my mind to. My Mom taught me that I was just as capable as any one else and I could do anything a man could do. But believing that and actually doing it are two different things. I built this coop entirely by myself (minus my husband cutting the 4×4 posts because he was worried I would hurt myself 🙂 ). It was hard work and it wore me out, but I did it. Now I feel like I can build anything! (Insert Super woman photo here!)

20140425_193518

Front view

20140425_193544

Left side

20140425_193700

Left side optional chicken door

20140425_193605

Left side door interior view


20140425_193746

Observation window/center door

20140425_193837

Chicken’s coop access door with stained glass above

20140425_193810

Center chicken door/main coop access from pen

20140425_193903 (1)

Center door/observation window


IMG_20140518_192940

Right side door


20140425_194030

Right interior view

20140425_194014

No coop is complete without stained glass windows.

20140501_110506 (1)

Happy chickens!


Do you have any questions on building a coop? I’m no expert BUT I FEEL LIKE ONE! 🙂


Violet infusion ice cubes for sick dogs (or humans)

1404099866849

My girl Bonnie has Lymphoma,  as I mentioned in the Rainbow Bridge post. I want to keep her as healthy and comfortable as I can while shes with us.
I give her 1 violet infusion icecube each day. She loves the way they taste. They taste like green beans to me.
Among other things, Violet is know for assisting the lymph system. It helps clear lymph nodes. What better way to care for my girl while shes living with lymphoma?
I read that, on average, dogs diagnosed with lymphoma usually live 2-4 months after diagnosis,  without treatment. It has been almost 5 months since Bonnie was diagnosed.

Heres how I make violet infusion.

Ingredients:
2 heaping cups of violet flowers (stems removed)
2 cups boiling water
1 quart sized mason jar with lid and band.

Fill the mason jar with the violet flowers.
Pour boiling water over the flowers.
Attach lid and band tightly.
Allow to rest on counter for a minimum of 4 hours, maximum of 24 hours. (It will spoil or lose its potency after 24 hours)
Filter the flowers from the infused water into a large bowl.
Place flowers into a towel or cheese cloth and squeeze the remaining liquid out of the flowers and into the bowl.

You now have infusion!
Pour the infusion into desired ice cube trays.  Store in freezer (did I really have to tell you that).

My Bonnie girl is about 40lbs. I only give her 1 cube a day. Violet can cause nausea and diarrhea in large quantities. I was giving her two a day and she seemed fine but then we had a day of throwing up, which may have been completely unrelated,  but nonetheless I reduced the amount cos I don’t want to go through that again.

If you don’t have the time to use the infusion immediately,  you can freeze it. Just thaw it when ready to make Easy Violet Jelly or additional icecubes.


*Update: After 8 months of fighting lymphoma, We had Bonnie euthanized. Her illness suddenly progressed quickly.
She was at home with her family when she passed. She is buried on our property. She took a huge part of our hearts with her.
You can read the story of her last days on earth, here. *

I am not a doctor. I am not a professional.  These are strictly my opinion. You don’t have to follow my opinion. Use at your own risk cos I didn’t tell you to do it. 🙂

Fermented Chicken Feed

1404099507883

The women in my Ladies Homestead Gathering group introduced me to fermented chicken feed. Bascially it is feed that has been soaking in water for a few days.

Why the heck would you want to soak your chicken feed? For me, I was concerned about mice and saving money. How does fermented chicken feed keep mice away? Well, the chickens love fermented feed and eat every crumb of it, leaving nothing for the mice to eat. How does fermented feed save me money? As I said, THE CHICKENS LOVE FERMENTED FEED and eat EVERY crumb of it. They don’t scratch through it and only eat the bits they like, spilling the rest on the ground (FOR THE MICE TO EAT!)

For those two reasons alone I was willing to try fermenting my chicken’s feed. But knowing that my chickens also absorb more nutrients from the fermented feed is another fantastic benefit. Fermented feed is also said to help chickens recover from molting more quickly. There are so many more benefits from fermented feed. Here is a great article on Fermented Chicken Feed from Natural Chicken Keeping.

Most of the methods I have heard of use a two 5 gallon buckets, one with holes drilled in the bottom. Put the feed in the bucket with holes drilled in the bottom then place the bucket inside of bucket number 2 (without the holes). Pour water over the feed until covered. Let it sit for 3 days, keeping the feed covered with water. On day 3, lift the bucket containing the feed out of bucket 2 and allow the water to drain into bucket 2. Serve to chickens.  This is a simple method that works well for larger flocks.

I have 5 chickens. I don’t need that much feed. Heres my method. I found this method on OhLardy.com . It works great for me and I wanted to share it along with a few tips I learned along the way.

What you need:

3 jars with lids

chicken feed

water


Start small!20140507_081125

I made the mistake of making a large batch before I would know if my chickens would eat it or not. I’m new with chickens, and my chickens are babies. They are still trying new things and are not sure of everything I put in front of them. So I made 2 cups of fermented feed for 3 days and the chickens wouldn’t touch it. 6 cups of feed went to waste (I WAS PISSED).

I have 5 Buff Orphington Chickens. They are about 10 weeks old. I have found that 1.5 cups of dry feed is right amount for them. You will have to adjust this for the size of your flock. And remember start small. Maybe try 1/2 a cup for the first 3 batches, then move up once you feel confident. We DON’T want to waste feed.

Also, if your chickens try it, look at you like your crazy then walk away (like mine did). Try adding dry feed on top of the fermented feed. Or maybe a few meal worms or other treat. My girls don’t like to try anything new but once I coax ONE of them into trying something the others will join in. My girls go crazy for the stuff now!

Use a larger jar!

If your new to fermenting anything, like me, you will quickly learn that fermented stuff bubbles and expands. Use a jar that is about twice the size of the amount of feed you’ll be using. If you don’t have big enough of a jar, you will have a stinky mess on your counter.

Use paper towels!20140512_071527 (1)

Even if you use a larger jar, sometimes the fermentation process can get a little wild and still manage to bubble over leaving a stinky mess on your counter. Make a little paper towel mat for under your jars. Better safe than sorry.


The Process:

Dump feed in jars.

Add water until all feed is wet and covered by about 1″. You may have to stick a knife in the feed and dig around to get water to the bottom feed.

Put lid tightly on jar.

Write the number “1, 2, or 3” on top of the lid depending on what day of the 3 day cycle you are on.

Set jar on paper towel mat on counter.

Repeat process every day for 3 days.

At the beginning of day 4, feed the contents of the day 1 jar to your chickens. Clean out the jar and begin the process again.

Thats it.

If its too wet when you serve it to your chickens, just add a little dry feed.

20140508_072259

A few ideas:

I have read about adding whey to the feed before you add water. I haven’t made Whey yet, but I will be trying that soon and I’ll let you know how that goes. I add garlic to the feed before I add water. You can also add vinegar if you like. I add vinegar to their water so I don’t want to over do it. I’m thinking you could add seeds and they will sprout, but I’m not sure about that. I don’t know if the fermentation process will stop the sprouting process. Like I said, I’m new to fermenting. But I’ll give it a try and let you know how that goes, or if you try it let me know how it goes for you!

Please let me know how your first time fermenting feed goes, or if you have any tips or tricks to share!

20140508_072638

20140508_104833

What Makes a Good Chicken Coop?

When I first started trying to figure out how to build a chicken coop I was a little overwhelmed.  Dimensions and positions and wire gauges. How the heck can you fit 9 chickens in 3 nesting boxes?! I drew up plans. I drew more plans. Ultimately what happened is I just got out there and started building it and worked on design as I built it. I did do research on requirements for a good coop.

– It has to be safe. If your worried about predators (like I am) then you need to take extra precautions to protect your fluffy butts.Consider building the coop raised off the ground. This will prevent predators from digging into the coop. If your design is built on the ground, bury 1/4″ hardware cloth below the coop floor before building.Use 1/4″ hardware cloth on all coop openings.  This is the hardest material for predators to claw through.Use double motion locks such as safety gate hooks. Single motion locks are very easy for raccoons (and other wise guys) to open.

-It has to be dry. I invested in the coop roof above all other materials. I went with a galvalume metal roof. It had to be special ordered. Its a bit thicker than whats available on the home improvement store shelves. We live in a heavily wooded area and I was concerned about tree limbs. Originally I wanted the clear corrugated roofing, but I read many reviews stating that they cracked, leaked and broke easily when branches landed on them. Here is what I bought.

-It has to have ventilation. The more ventilation the better!  Proper ventilation reduces ammonia build up which is a major cause of respiratory irritation for chickens. Also make plans on how to close off those ventilation windows during inclement weather.  It could be as simple as a tarp as long as it gets the job done.

-It has to have light. Chickens need light to produce eggs. Natural light cycles also promote healthy sleep habits which is important for over all health. Sun light also kills bacteria.

-It has to have room. A coop needs to supply a minimum of square 3′ of floor space per chicken. I have 5. I need a minimum of 15’of floor space. But I read over and over to build it bigger than you think you need it because chickens are addictive and they end up multiplying. Also, the more space they have the less squabbles there will be. They chickens has room to mine their own business. My coop has 32′ of floor space. I hate squabbling. Those are the Have to’s of chicken coops. Thats it. Chickens will lay eggs whether they have a nesting box or not. They can sleep on the floor. I’m not saying thats the BEST for them, its just not required.

-It should have a roost. Look, my chickens still huddle in the corner of the coop on the floor. Is it going to kill them? No, but it’s not whats best for them. Roosting, basically, keeps them from sleeping in poop. Chickens poop a lot. Even when they are sleeping. On a roost, the chicken’s poop will fall to the floor, and they stay out of it. Simple.

-It should have nesting boxes. Nesting boxes provide a secluded, reserved spot for laying eggs. If you train your chicken to not sleep in the boxes, the eggs will stay clean. Having a nesting box also keeps eggs from getting broken which prevents chickens from eating eggs (which is a whole nother problem you’ll have to solve). If you really want to give your girls the best, add curtains to the front of the boxes. This gives them extra privacy. Yes, chickens appreciate privacy when laying. The size of the nesting box depends on the size of the bird. Also, chickens share nests. Thats why you can get 9 chickens into 3 nesting boxes. 3 chickens per nest.

-It should have an attached run. Unless you are free ranging your birds, you really should have a run. The run gives them space to scratch, sun bathe and take dust bathes. It also gives them fresh air and access to bugs. It gets them “out of the house” so they aren’t “all cooped up”. I would say that even if you are free ranging, you should have a run. Sometimes the chickens need to stay safe and confined. Please keep in mind that most predators can tear through chicken wire. Chicken wire is made to keep chickens in, not to keep predators out.

-Food and water? I don’t keep food in the coop or the run during the night. I feed my girls fermented feed in a dish, twice a day. They eat every crumb which keeps the mice from being tempted to visit. I keep water in both the run and the coop. I made drinking jars with watering nipples. They were made properly so they don’t leak and the chickens can’t knock them over or spill them. The jars are also closed containers so the water stays clean. Your chickens should always have access to water. No discussion on that.

Here are a few things I learned on how to make your coop the most functional. Build the coop tall enough to stand in. Don’t build it so you will be hunched over. You will be in there a lot. Take care of yourself.  If you are building it off the ground, make it waist heigh so that you aren’t hunched over when your cleaning it out. Have access doors that allow you to reach every part of the coop. My coop has a door on 3 of the 4 walls for easy cleaning. Use Laminate to cover the floor of the coop. This makes cleaning easy. This is the best investment I made in the coop after the roofing. Screen the coop with bug screen as well as hardware cloth. I know that sounds crazy but mosquitoes and flys can make you chickens ill. I’ve even read of a story where a flock were killed over night by biting flies. You can get screening for next to nothing. I suggest aluminum screening to prevent tearing. You can buy it here.  One last tip, the human entrances and exits need to open into the coop/pen as opposed to opening outward. Having the doors open inwards will help prevent the chickens from escaping.


Here are a few photos of my chicken coop set up. The lack of poop and dust shows that this is before the chickens moved in. It is not perfect. I find myself improving it often. What does your set up look like?20140425_193518


20140425_193700 20140425_193605 Do you have any tips for building a coop? Please share by commenting 20140425_19381020140425_194030below!

How to protect your flock from Hawks

We have a family of Hawks that live on our homestead.

Before our chickens moved in, we loved watching the Hawks swoop down and catch squirrels and mice. The Hawks will perch in the trees and eat their prey. It really is amazing to see the circle of life in front of you.

Now that we own chickens I HATE HAWKS!!! My neighbors think I’m crazy clapping my hands and yelling at the trees to “Get out of here!!”

I have done some research on methods to help protect my flock from those pesky hawks. I hope that you can use some of these methods to help yours as well.

Buff Orphington

Buff Orphington

-Chicken color- If you know you have a hawk problem before you have chickens, do some research on the type of chicken the best suits your needs and has a neutral color. I went with the Buff Orphingtons. I chose then because of their sweet demeanor, large size, and their coloring helps them blend into their surroundings making it hard for the hawks to see them.


Owl Decoy

Owl Decoy

-Owls – Hawks and Owls are natural enemies. Keep a plastic decoy owl near the coop/ foraging area and most Hawks will stay away.- -Over head protection Hawks don’t like to fly into areas where they cannot escape easily.


Chicken-Coop jpgZig zag string across the top of your chickens run or fenced area. White string works the best because it is easily visible.


-Chicken wire or netting over the run can reduce a Hawks desire to fly into that area but a determined hawk can easily tear through netting, so chicken wire is definitely recommended. Side note- Chicken wire is meant to keep chickens confined, it is NOT made to keep predators out.


pennant-48962_640-Pennant flags – you know those cute birthday strings with the adorable little, multi-colored flags hanging from them? Well, apparently those cute little decorations worry the Hawks when they flutter in the wind.


IMG_20140509_165859-Dogs – Hawks aren’t stupid. They know they can be eaten. If you have a dog that you know will not eat your chickens, allow it to spend time in the yard with the flock. Guard dogs are a great asset to any homestead.


IMG_20140516_155334-Rooster- If you haven’t considered it, a rooster is a great protector. Roosters are known to fight to the death to protect their flock. They will also scream out warning calls if they see something suspicious.


00H0H_irqf5a1SjrK_600x450-Guineas- Guinea birds are noisy and they are down right annoying when they see something unusual on THEIR property. Guineas will sound the alarm a the slightest suspicion. They have also been known to fight to protect their flock and property against snakes and mice. They also LOVE ticks and other bugs. If you can deal with the noise, Guinea birds make a great addition to the homestead.

-Hiding spots Be sure to plant shrubs where your chickens will be hanging out. They make great hiding spots. I recommend planting multi-purpose landscaping such as blueberry or mulberry bushes. This provides hiding spots and food!

-Laundry! – I have my clothes line in my chickens foraging area. This gives my chickens a visible barrier and also makes the hawks nervous about easily escaping. The laundry fluttering in the wind also causes the hawks the avoid the area.

IMG_20140507_104541The best protection I give my chickens is my presence. Most hawks avoid human contact, although some are known to be very arrogant, like the Cooper’s hawk. I spend as much time in the yard with my girls as I can. I am sitting in the yard now writing this entry as they peck at my toes. Oh look I’m doing laundry too, multi-tasking at its finest!

If you have a concern with hawks, or any other chicken predator, take some time to determine which species of hawk, or other predator, you have. Knowing your enemy is your best defense.

Do you have any tips or tricks? Please share them with me by commenting.